Custom Domains
Custom Domains let you serve the embedded chat widget for an AI agent from your own subdomain, for example chat.yourcompany.com, instead of the default Chatislav domain.
Custom Domains is an Enterprise / enabled-workspace feature. If it is not enabled for your workspace, the screen shows an upgrade prompt.
Before You Start
Before adding a domain, make sure you have:
- Access to your DNS provider for the domain you want to use
- A dedicated subdomain, such as
chat.yourcompany.comorsupport.yourcompany.com - Custom Domains enabled for your Chatislav workspace
- The AI agent you want this domain to serve
Domain rules:
- Enter only a hostname, for example
chat.yourcompany.com. - Do not include
https://, paths, ports, query strings, or trailing slashes. - Use a subdomain. Do not use your root domain, for example
yourcompany.com. - One AI agent can have one custom domain at a time. Remove the existing domain before adding a different one.
- A custom domain cannot be used by another agent or workspace.
Step 1: Open Custom Domains
- Log in to your Chatislav dashboard.
- Select the AI agent you want to configure.
- In the left sidebar, open "Custom Domains".
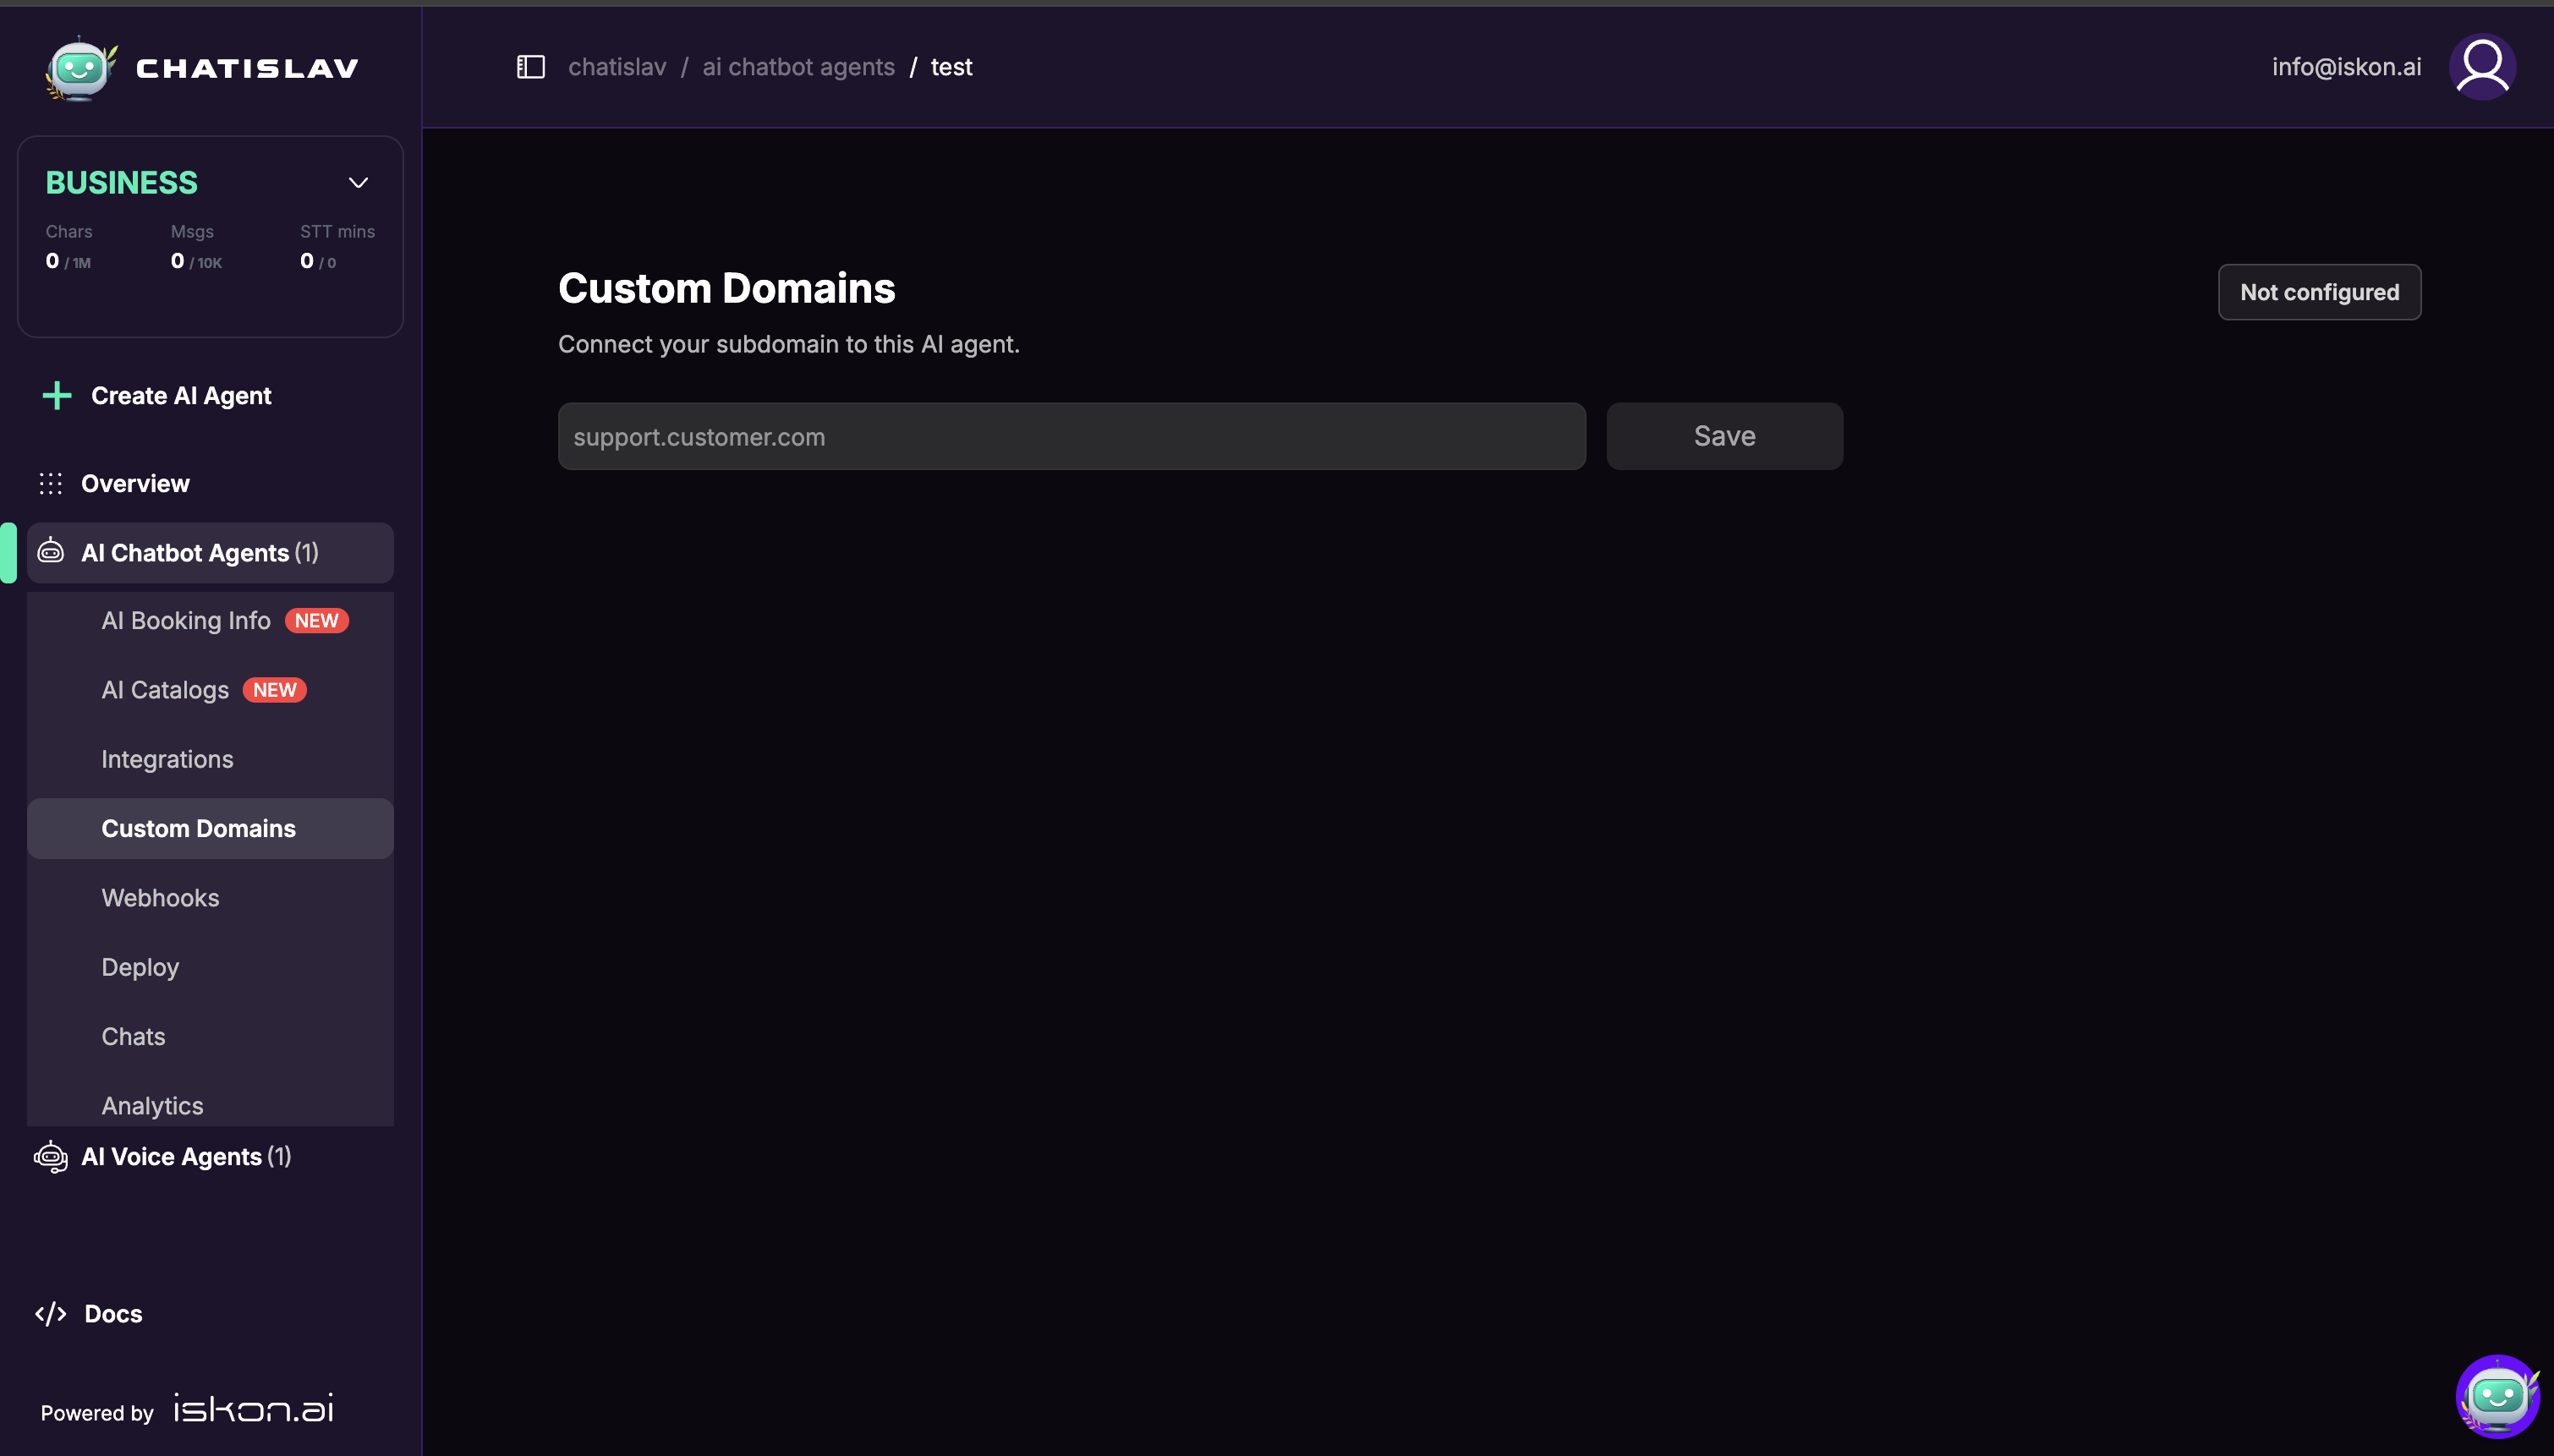
Step 2: Save the Subdomain
- Enter the subdomain you want to use, for example
chat.yourcompany.com. - Click "Save".
- Chatislav creates a DNS record for that AI agent and shows the record values you need to add at your DNS provider.
Step 3: Add the DNS Record
After saving the subdomain, Chatislav shows a DNS record section.
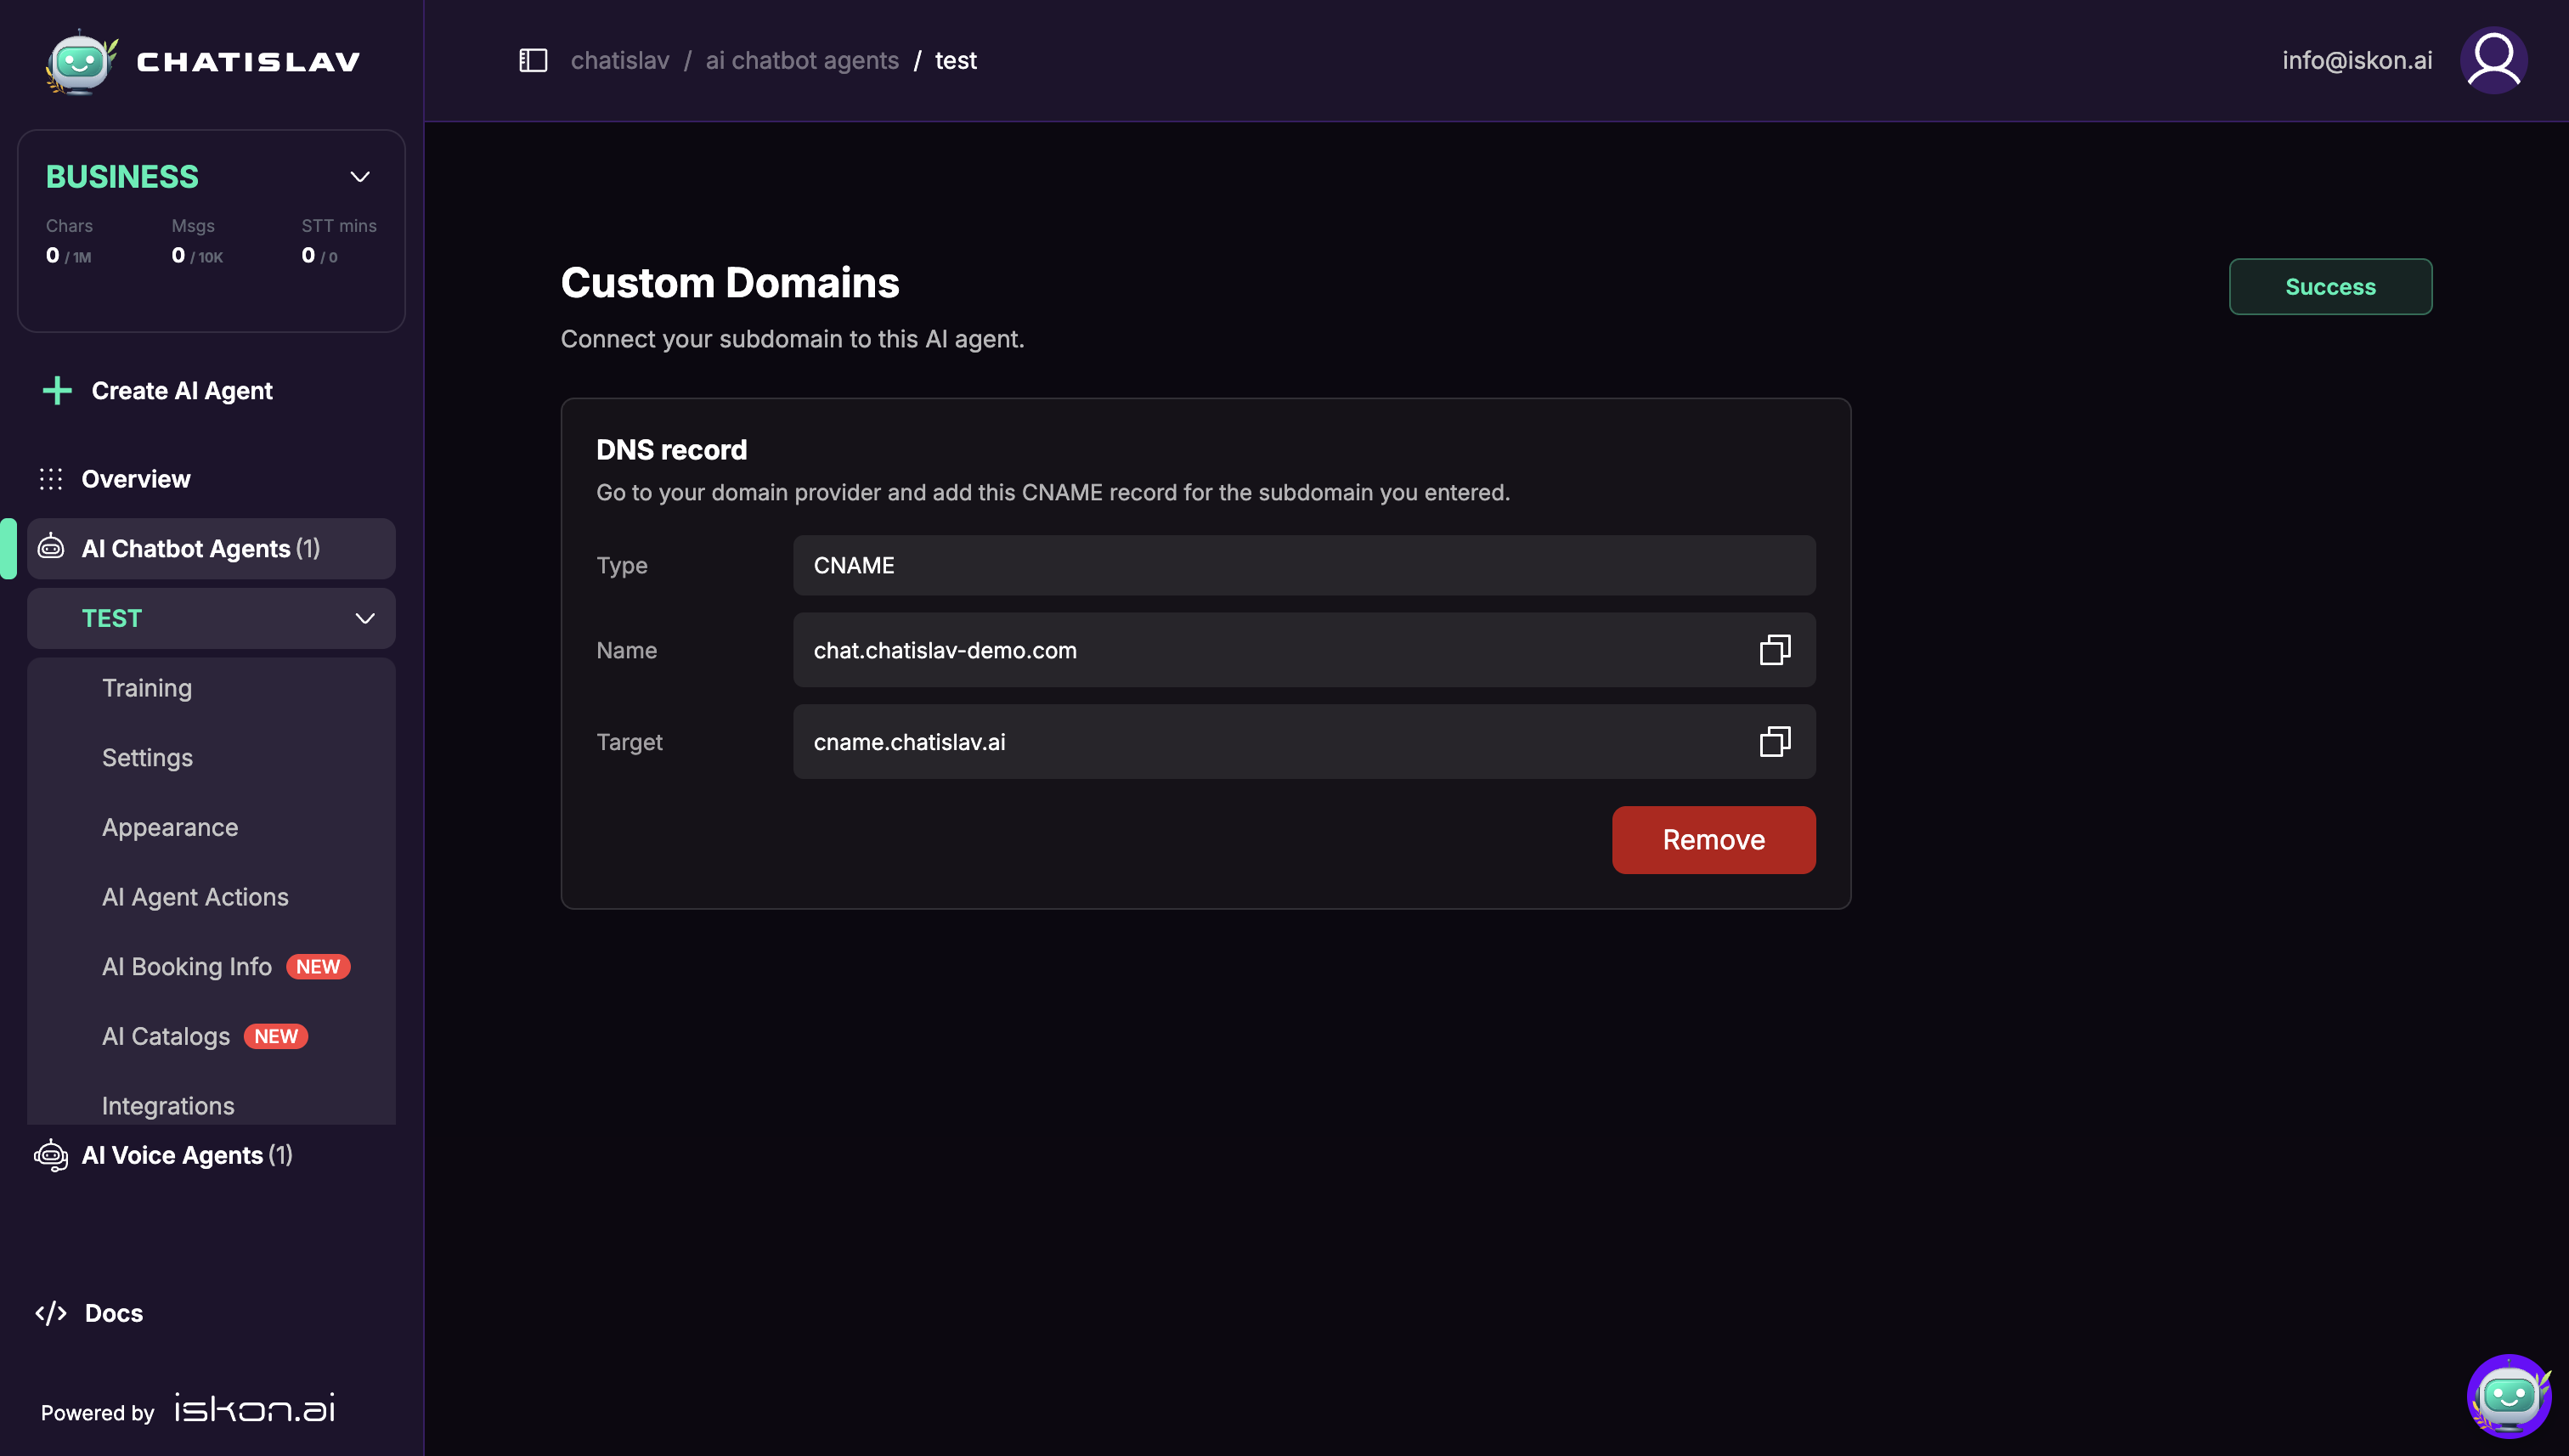
Create the shown record in your DNS provider:
| Field | What to enter |
|---|---|
| Type | CNAME |
| Name | Copy the Name value from Chatislav. Some DNS providers want the full hostname, while others want only the subdomain part, such as chat. |
| Target | Copy the Target value from Chatislav, for example cname.chatislav.ai. |
Use the copy buttons in Chatislav to avoid typos.
Step 4: Wait for Verification
The status badge shows the current state:
- Not configured - no custom domain is saved for this AI agent.
- Pending - Chatislav is waiting for DNS to resolve to the required target and finish provisioning.
- Success - DNS is verified and the custom domain is ready to use.
- Failed - verification or provisioning failed. Check the DNS values and try again after DNS updates propagate.
DNS propagation can take time. If the domain stays Pending, confirm that the DNS record's Name and Target match the values shown in Chatislav.
Step 5: Use the Custom Domain in Deploy
When the custom domain status is Success, open "Deploy" for the same AI agent. In the Deployment URL dropdown, select your custom domain.
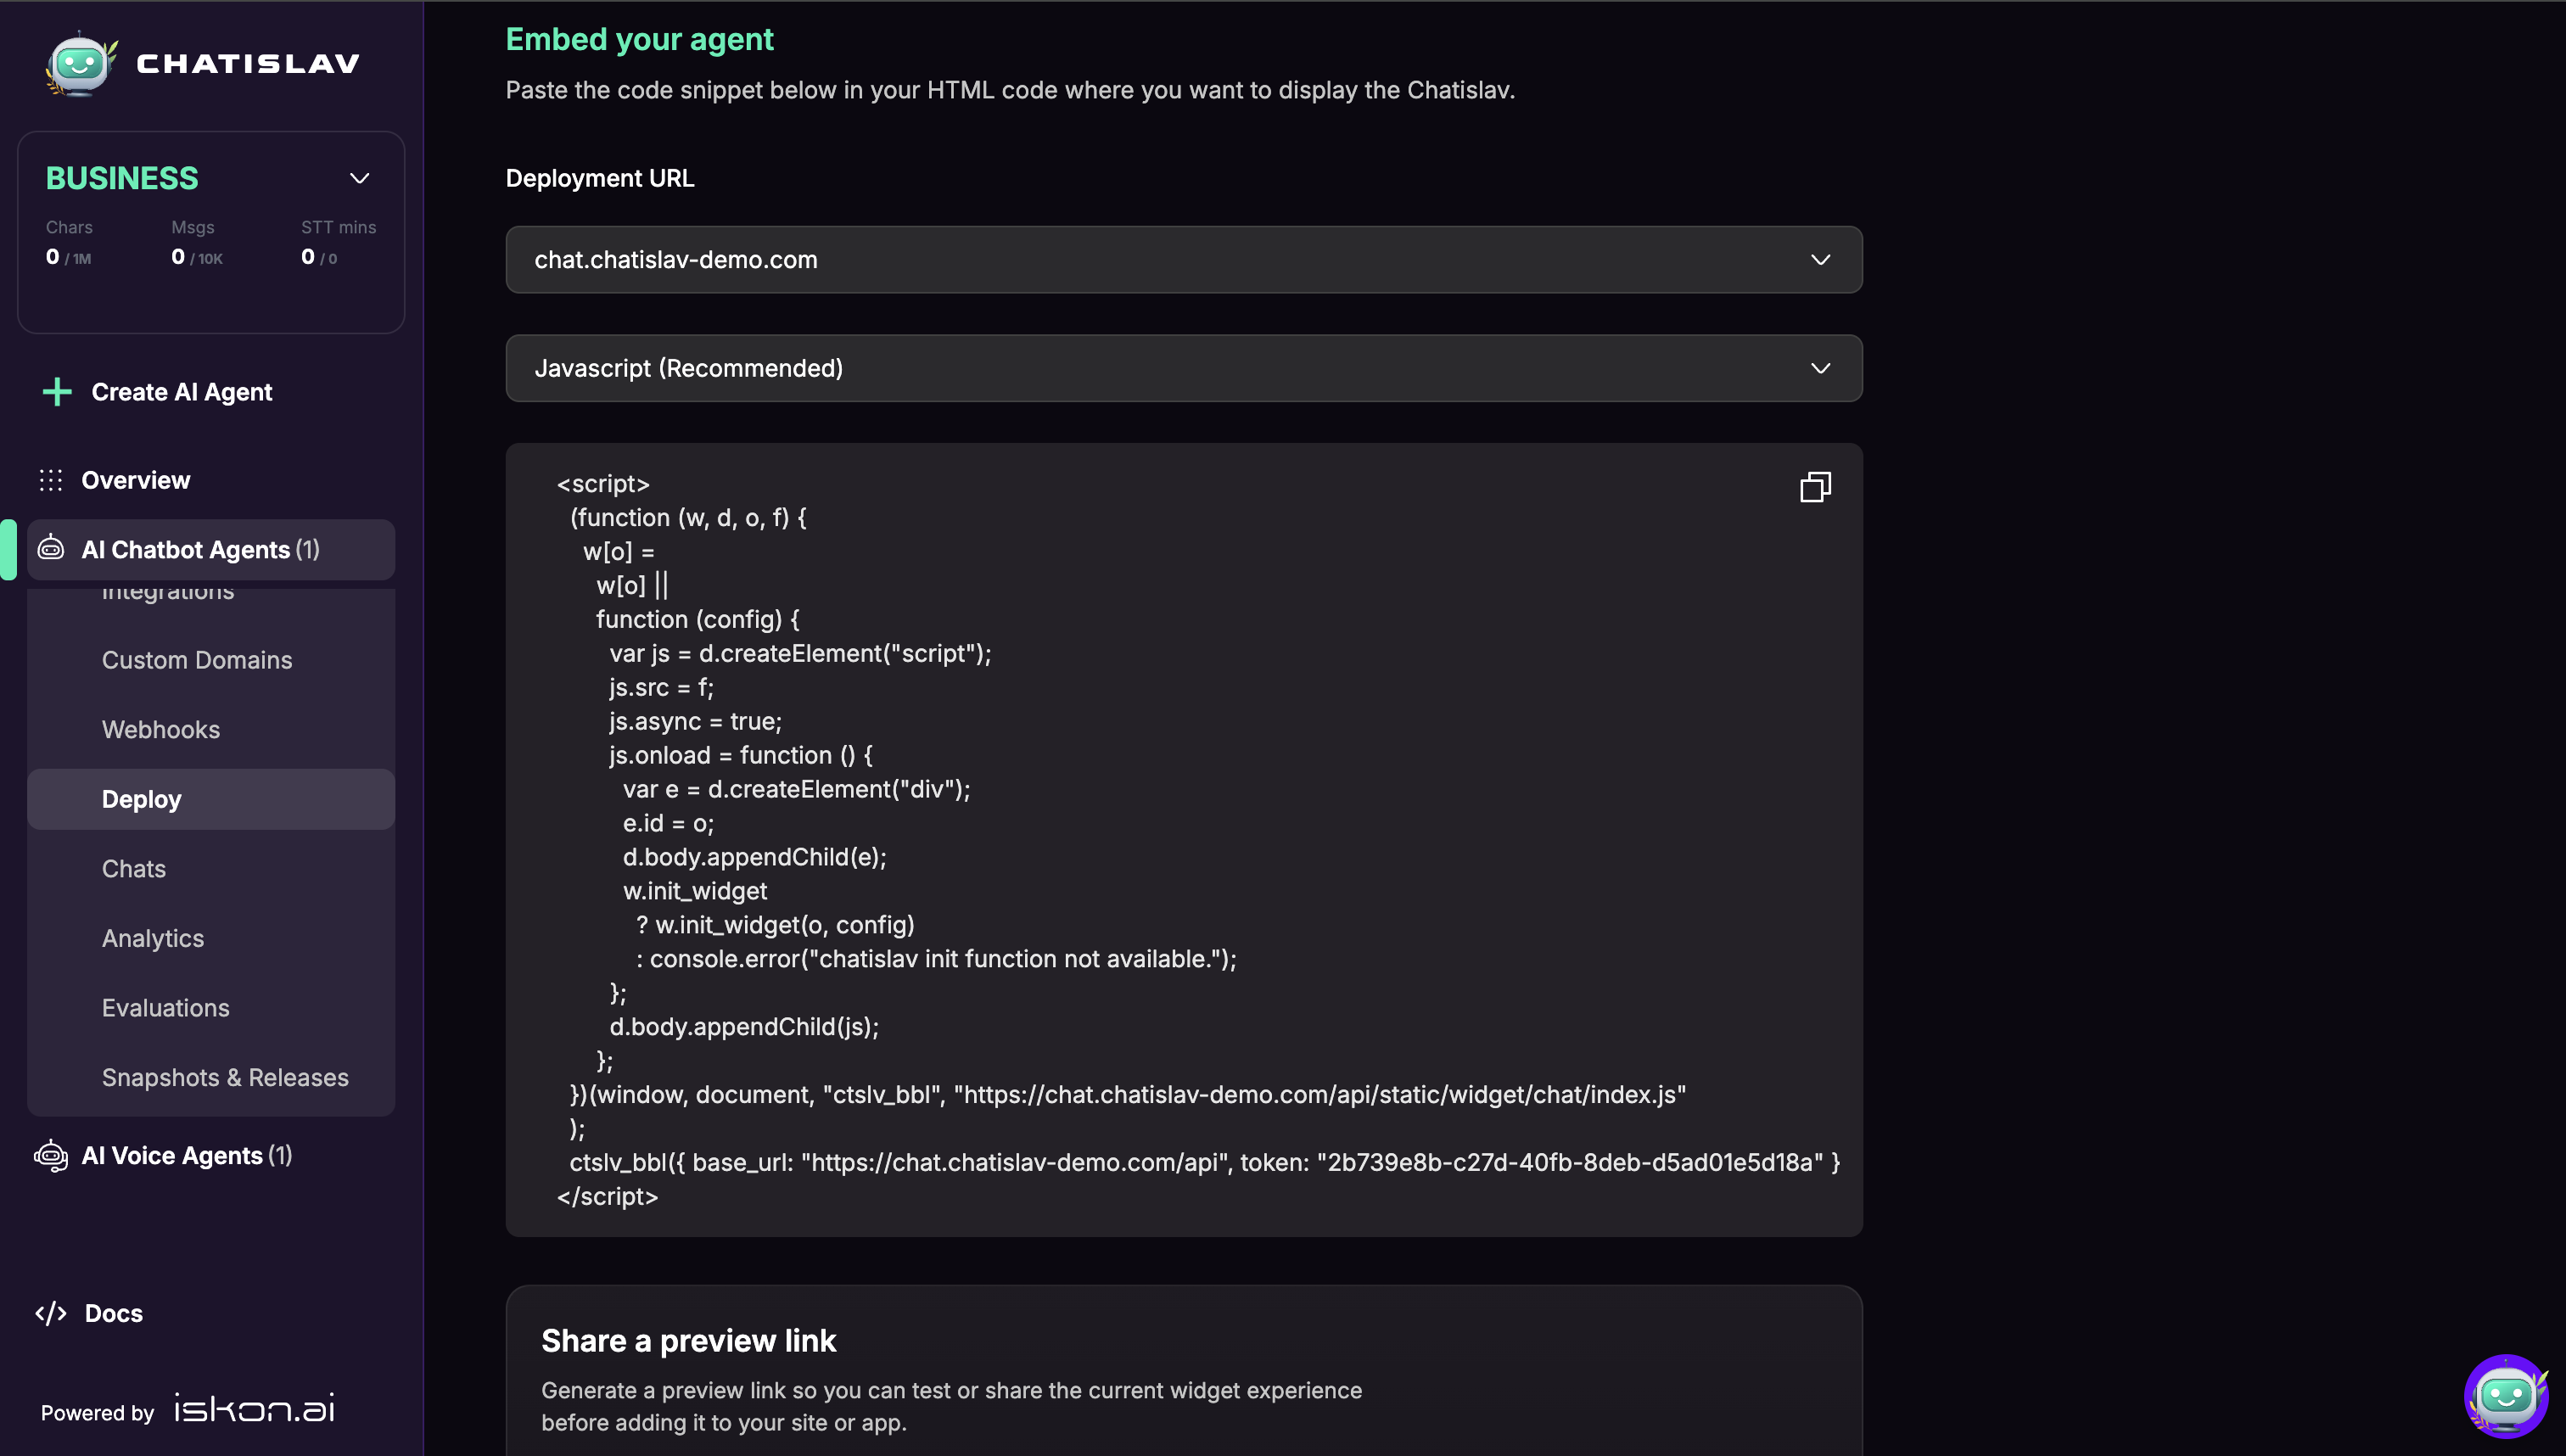
After selecting the custom domain, copy the generated embed snippet. The snippet uses your custom domain for the widget script and API base URL, for example:
- Script URL under
https://chat.yourcompany.com/api/static/widget/... - Base URL under
https://chat.yourcompany.com/api
Replace any older widget snippet on your website with the new custom-domain snippet.
Removing a Domain
To disconnect a custom domain:
- Open Custom Domains for the AI agent.
- Click "Remove".
- Confirm the removal.
After removal, generate a new deploy snippet from the default deployment URL and update any website that was using the removed custom domain.
Troubleshooting
The domain stays Pending
Check that:
- The DNS record exists at your DNS provider.
- The record type is CNAME.
- The target matches the value shown in Chatislav.
- Your DNS provider did not automatically append the domain twice. For example,
chat.yourcompany.com.yourcompany.comis incorrect. - DNS propagation has had enough time to complete.
Domain does not resolve
The DNS provider has not published the record yet, or the record was added in the wrong DNS zone. Confirm that the domain's authoritative DNS provider contains the CNAME record.
Domain is not pointing to the required target
The domain resolves, but not to the Chatislav target. Update the CNAME target to the value shown in Chatislav.
This domain is already used
The domain is already connected to another agent or workspace. Use a different subdomain or remove the existing custom-domain connection first.
The widget still loads from the old domain
Open Deploy, select the custom domain in Deployment URL, copy the generated snippet, and replace the old snippet on your website.
Best Practices
- Use a dedicated subdomain such as
chat.orsupport.. - Do not point your main website root domain at Chatislav.
- Copy DNS values directly from Chatislav.
- Wait for Success before using the domain in production.
- Regenerate and replace your deploy snippet after switching deployment URLs.