Facebook Messenger Integration
Connect your Chatislav AI agent to Facebook Messenger to provide automated customer support and engagement directly through Facebook. This integration allows your customers to interact with your AI agent without leaving their Facebook experience.
Prerequisites
Before you begin the integration process, ensure you have the following:
- Facebook Business Account: A Facebook Business account with admin access
- Facebook Page: A Facebook Page that you manage (required for Messenger integration)
- Chatislav Account: An active Chatislav account with at least one AI agent created
- Plan access: Facebook integration must be included in your Chatislav plan. It is available from the Standard plan and higher.
Important Notes:
- You must be an admin of the Facebook Page you want to connect
- The Facebook Page must be published (not in draft mode)
- You do NOT need to create a Meta Developer app or configure webhooks manually - Chatislav handles all of this automatically through OAuth
Step 1: Navigate to Integrations
- Log in to your Chatislav dashboard
- Select the AI agent you want to connect to Facebook Messenger
- In the left sidebar, click "Integrations"
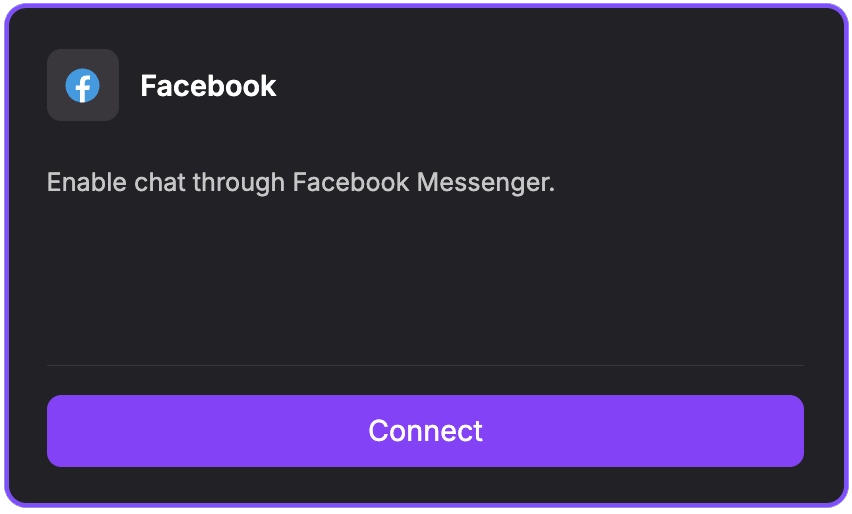
- You'll see a grid of available integrations and the "Facebook" card.
Step 2: Connect Facebook via OAuth
- Click the "Connect" button on the Facebook card.
- A setup modal will open with a short explanation of what the integration will do.
Review the information and click "Connect" in this modal to continue.
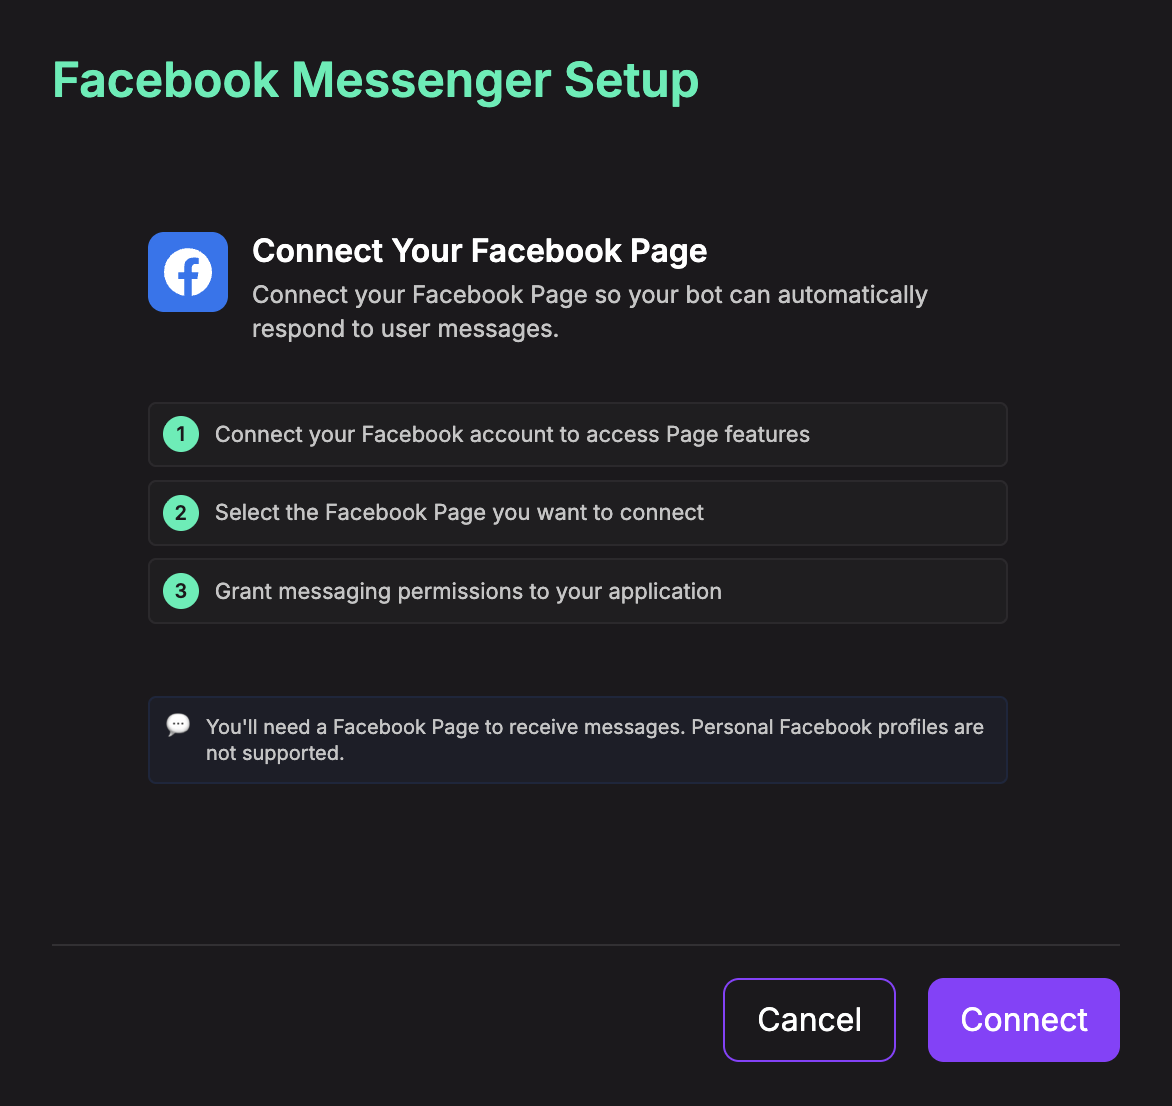
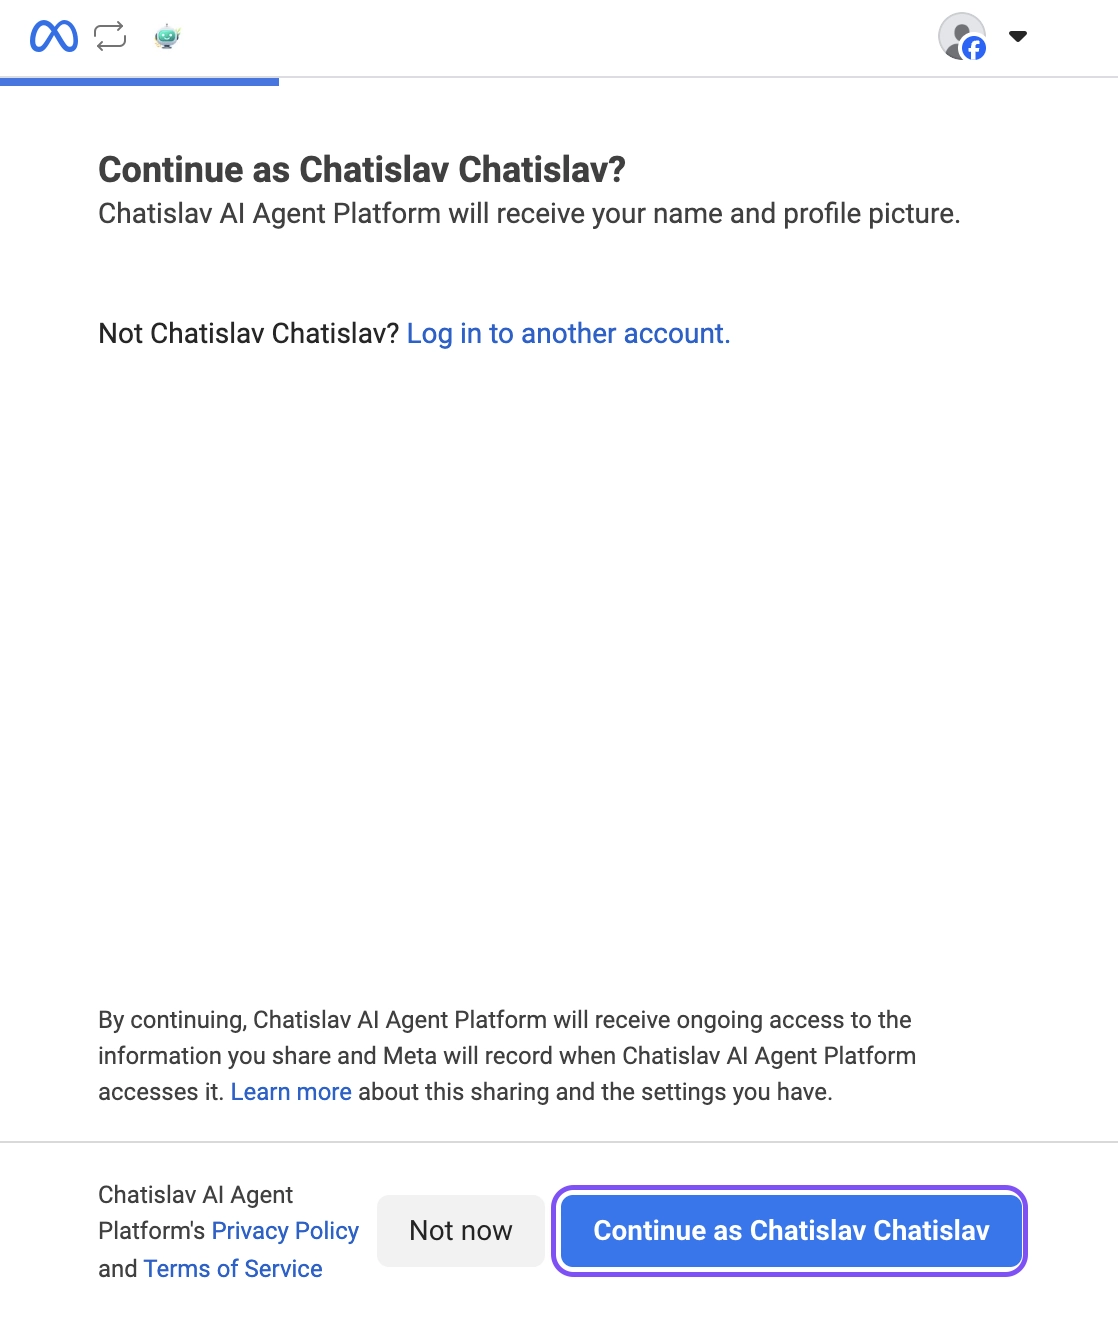
- You will then be redirected to Facebook's OAuth authorization flow.
-
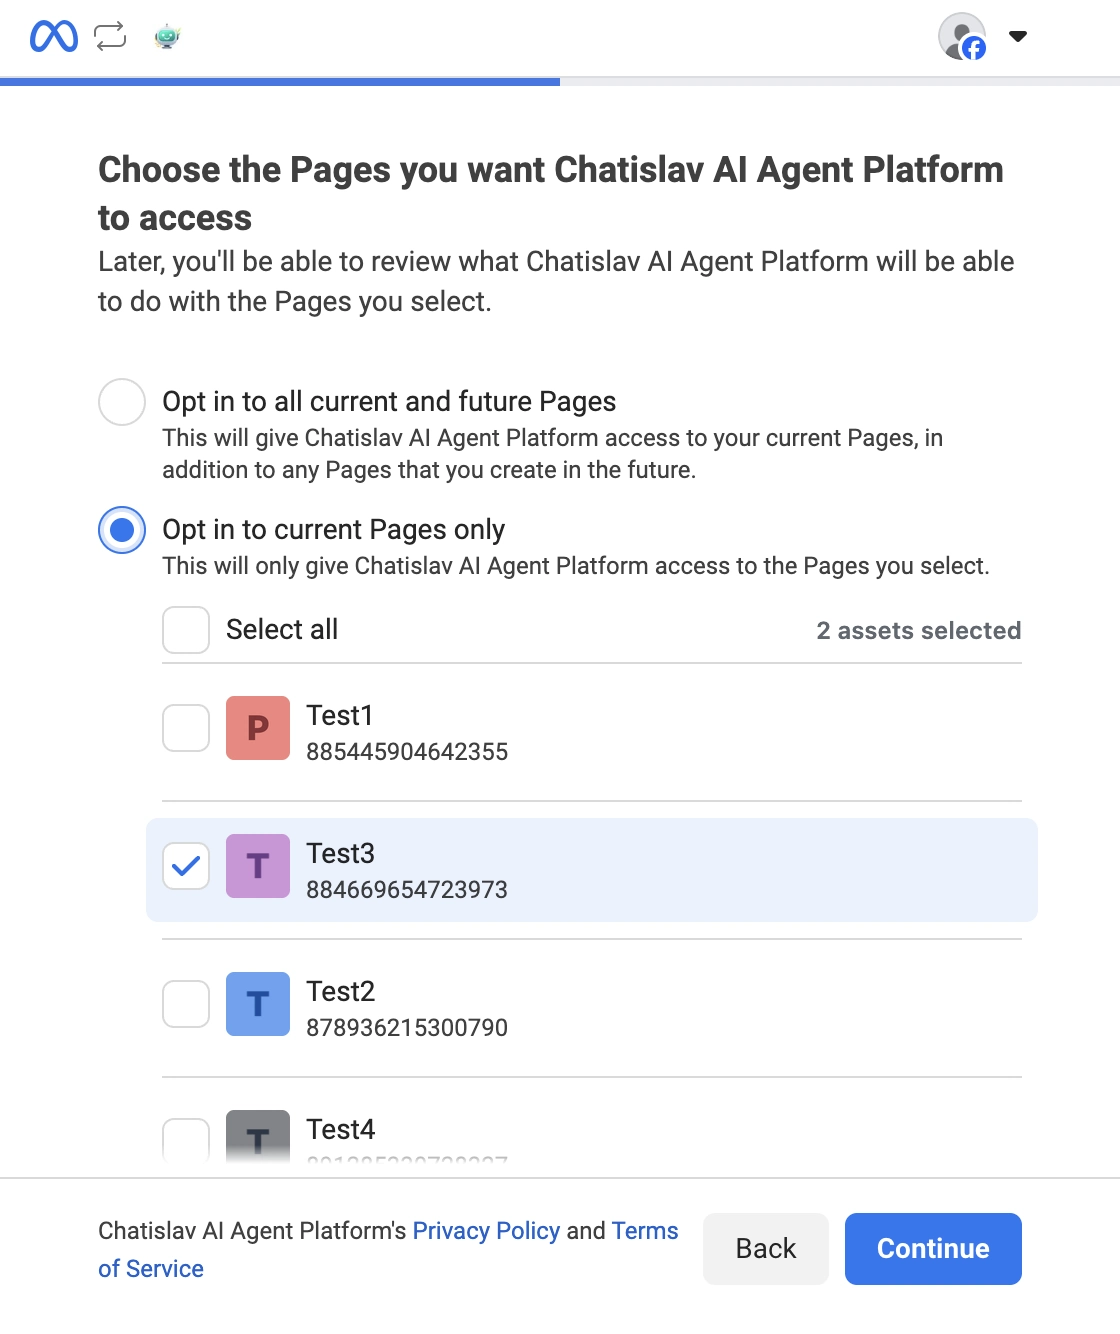
Facebook will then show you a list of your Facebook Pages and ask which ones you want to connect to Chatislav.
You'll see two options:- "Opt in to all current and future Pages" – automatically gives Chatislav access to all your current Pages and any Pages you create in the future
- "Opt in to current Pages only" – gives access only to the specific Pages you select from the list below
Select the Pages you want to integrate (check the boxes next to each Page), then click "Continue".
-
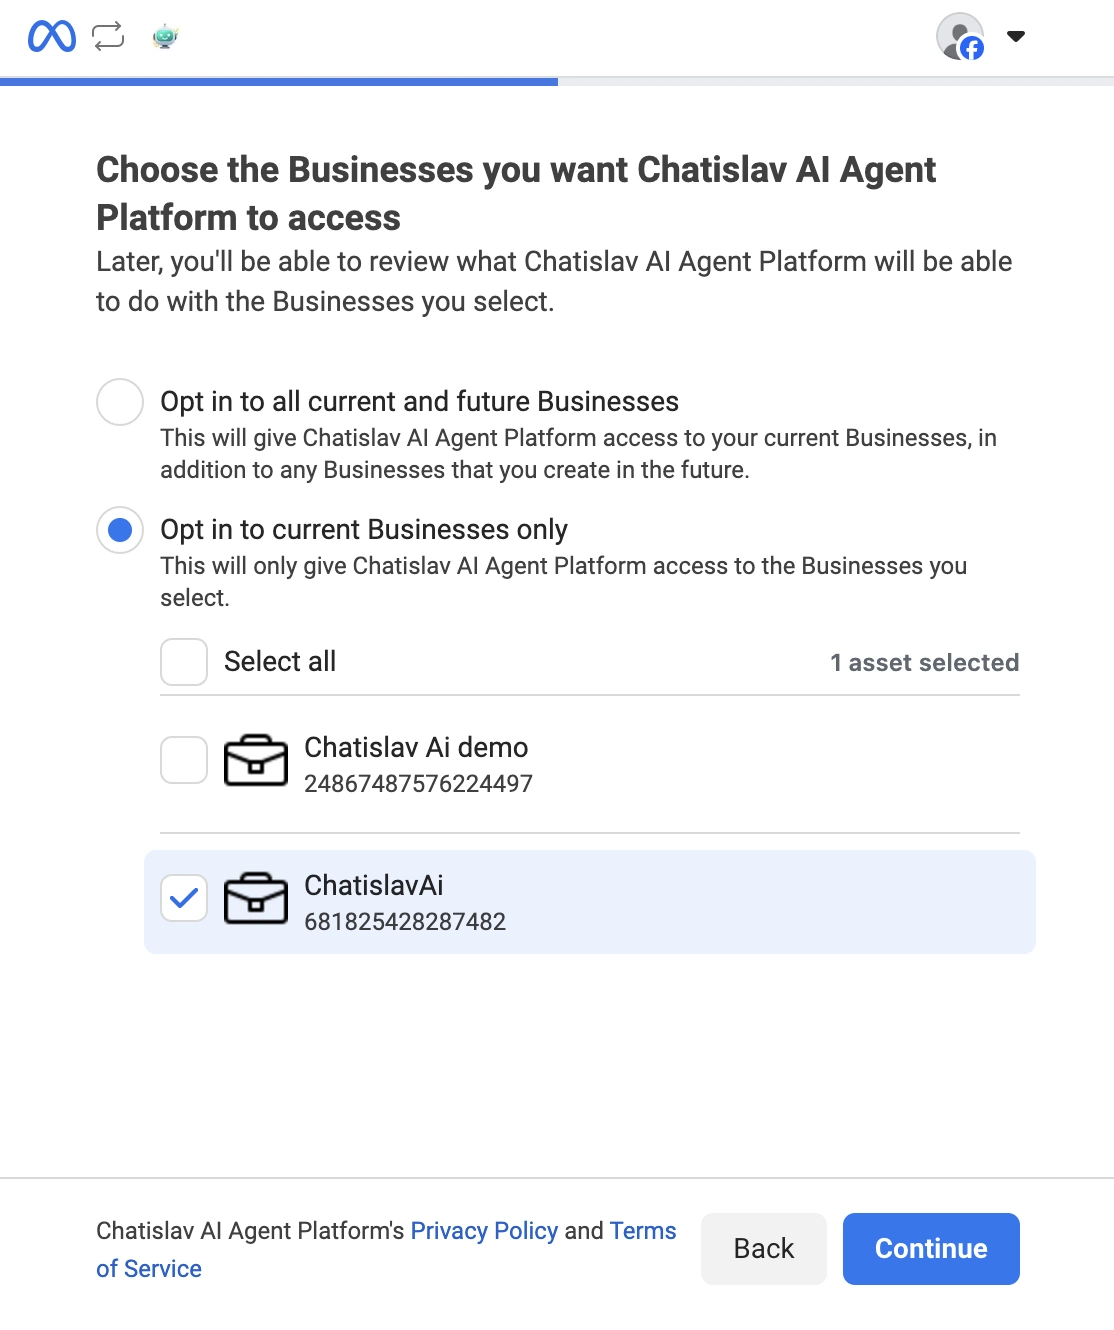
Next, Facebook will ask you to choose which Business accounts (Meta Business Manager accounts) you want to connect to Chatislav.
Similar to the previous screen, you'll see two options:- "Opt in to all current and future Businesses" – gives Chatislav access to all your current Business accounts and any new ones you create later
- "Opt in to current Businesses only" – gives access only to the Business accounts you select from the list
Select the Business account(s) you want to connect (check the boxes), then click "Continue".
-
Facebook will now show you a final review of all the permissions Chatislav will have. You'll see a summary including:
- Manage your business (Business accounts selected)
- Manage and access Page conversations on Messenger (Pages selected)
- Manage accounts, settings and webhooks (Pages selected)
- Show a list of the Pages you manage (Pages selected)
Review the permissions and click "Save" to confirm and complete the connection.

- You'll be redirected back to Chatislav automatically.
- A success message will appear confirming the connection.
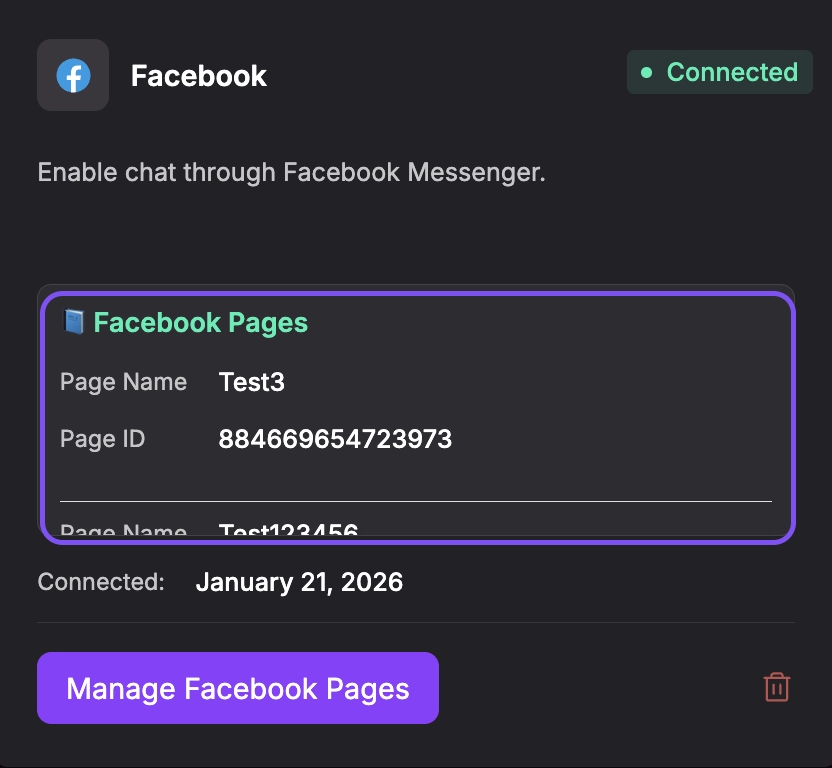
- The Facebook integration card will now show a "Connected" status badge and display a summary of your connected Pages, including Page names, Page IDs, and the connection date.
Step 3: Manage Your Facebook Pages
Now that your integration is connected, you can manage which Pages are actively handling messages.
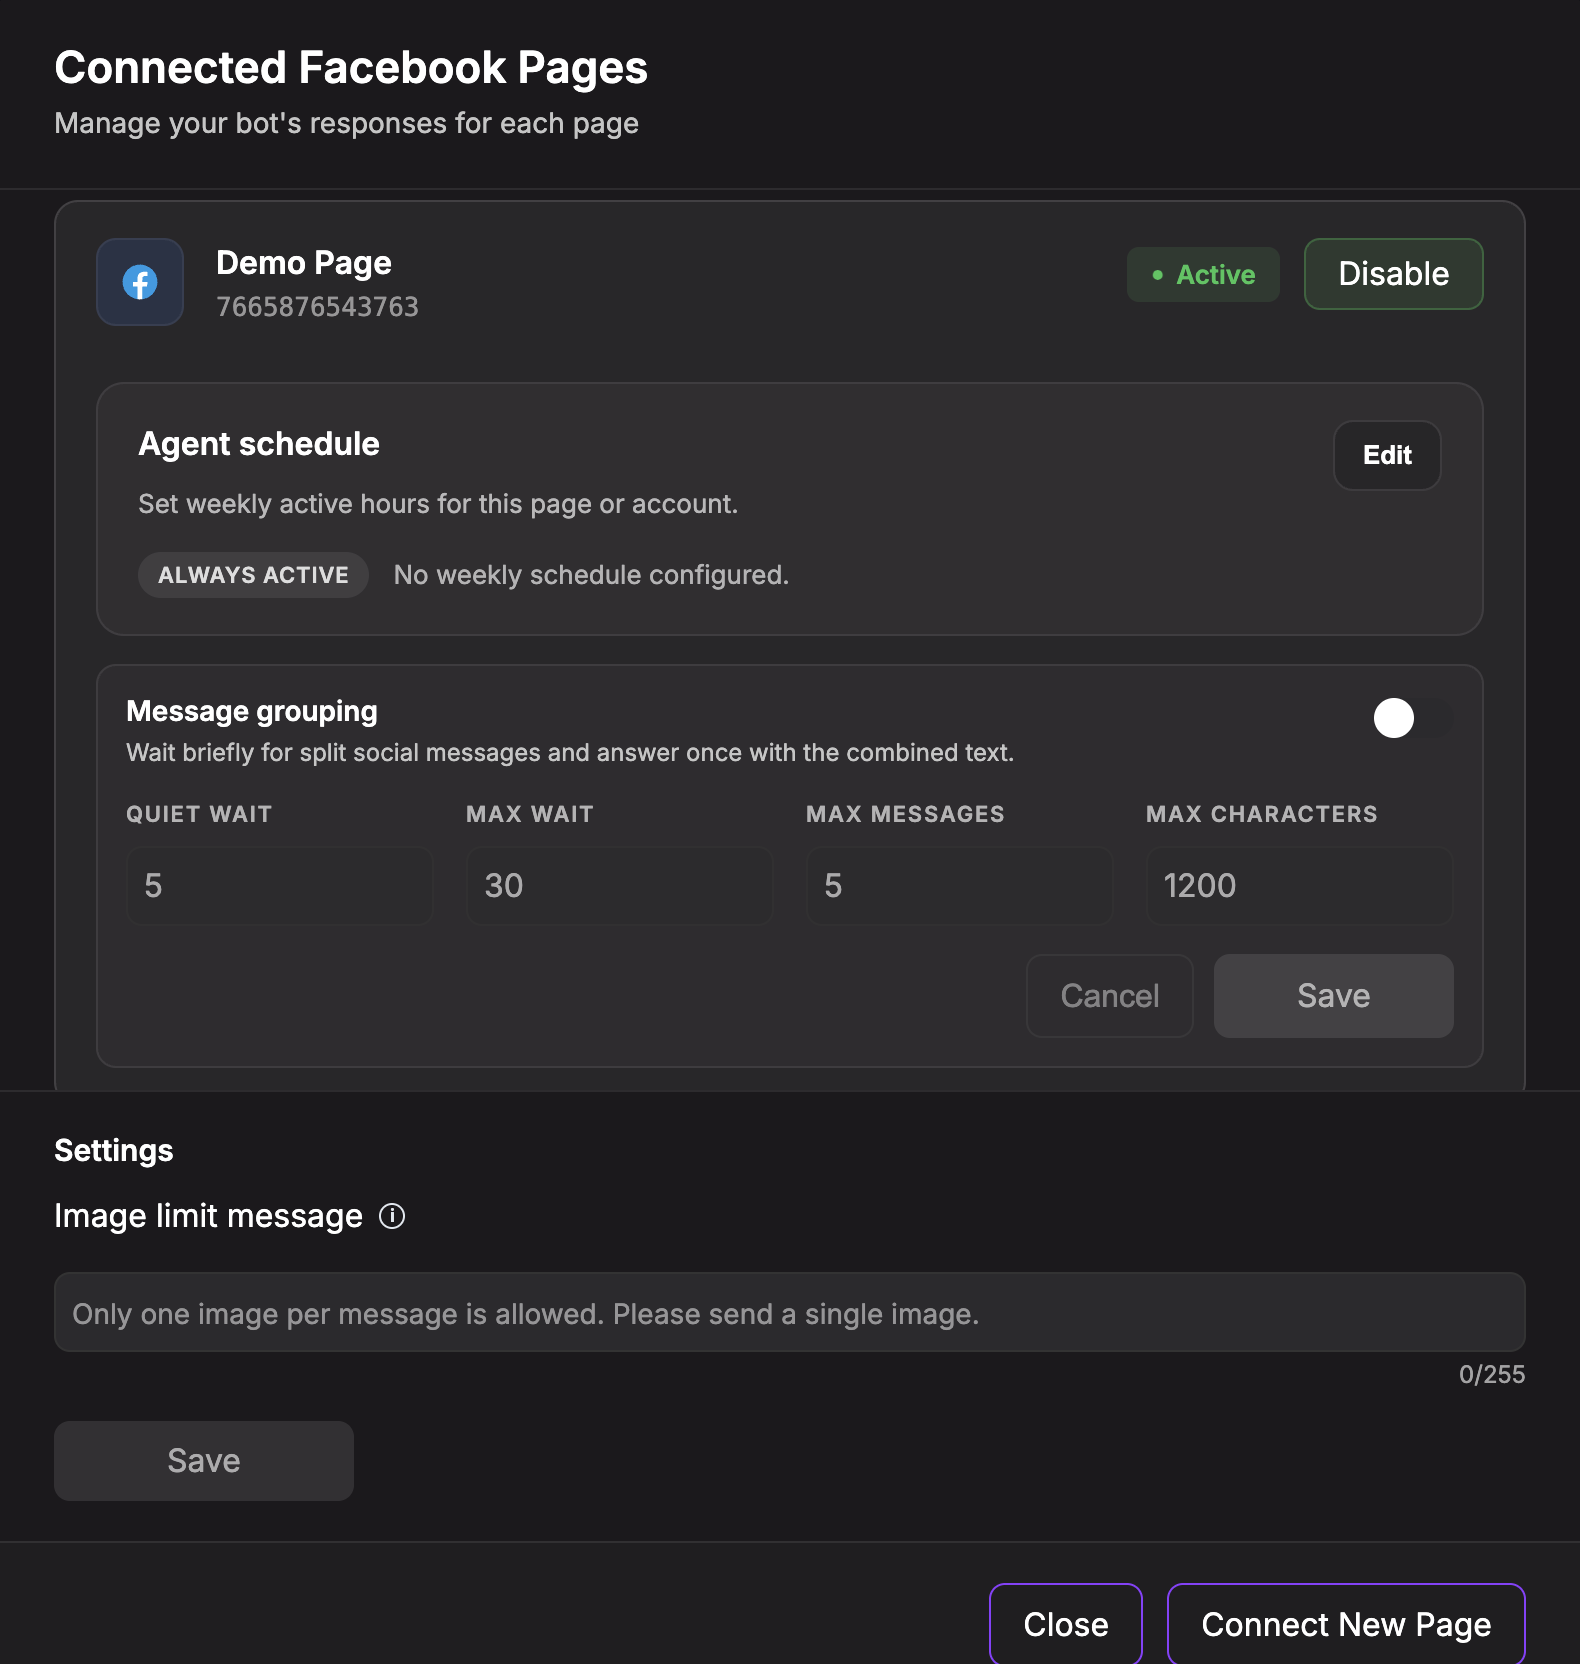
- Click the "Manage Facebook Pages" button on the Facebook integration card. A modal will open showing the connected Facebook Pages for this agent.
-
For each Page in the modal, you'll see:
- Page Name: The name of your Facebook Page
- Page ID: The unique identifier for the page
- Status: Whether the page is Active or Inactive
- Toggle Button: Enable or disable the page
- Agent schedule: Optional weekly active hours for that page
- Message grouping: Optional waiting period for split messages before the agent answers
-
To enable a page for your AI agent:
- Click the "Enable" button next to the page
- The status will change to "Active" (green indicator)
- Messages sent to that page will now be handled by your AI agent
-
To disable a page temporarily:
- Click the "Disable" button next to the page
- The status will change to "Inactive" (orange indicator)
- Messages to that page will no longer be processed by your agent
Step 4: Configure Page Settings
The Manage Pages modal also includes page-level settings:
- Agent schedule — set weekly active hours for a Facebook Page. Outside scheduled hours, the AI agent stays silent for that page.
- Message grouping — wait briefly for customers who send several short messages in a row, then answer once using the combined message.
- Image limit message — customize the reply shown when a user sends more than one image in a single message.
Use these settings when you want Messenger behavior to match your team's working hours, response style, or image-handling policy.
Step 5: Add Additional Facebook Pages
If you want to connect additional Facebook Pages after the initial setup:
- Open the "Manage Pages" modal
- Click the "Connect New Page" button at the bottom
- You'll be redirected to Facebook OAuth again
- Select any new Pages you want to add (or grant access to additional pages)
- Complete the OAuth flow
- You'll be redirected back to Chatislav
- The new pages will appear in your list and you can enable/disable them as needed.
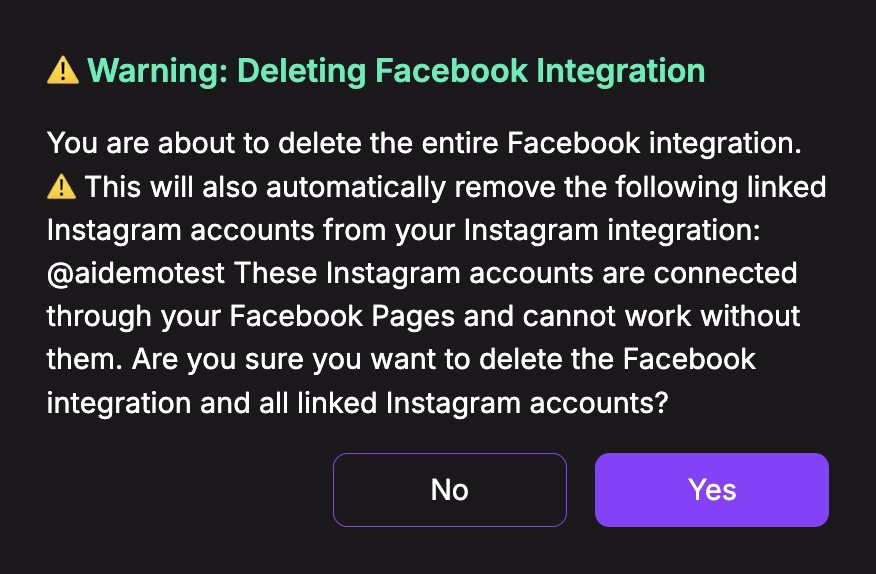
When reconnecting through OAuth, review the selected Pages carefully. If you remove access to a Page that is linked to Instagram, Chatislav will warn you because that Instagram account may also be affected.
Step 6: Understanding Facebook and Instagram Integration Relationship
If you're also using the Instagram integration, it's important to understand how Facebook Pages and Instagram accounts are linked:
- Instagram Business accounts are linked to Facebook Pages.
- When you delete a Facebook integration, Chatislav checks if any Instagram accounts are using those Facebook Pages.
- If Instagram accounts are linked, you'll see a warning before deletion listing the affected Instagram accounts.
- If you continue, linked Instagram accounts can also be removed because they share the same Meta connection.
Important: If you disable a Facebook Page that's being used by an Instagram account, the Instagram integration will continue to work, but you should be aware of this relationship when managing your integrations.
Human Handoff (Take Over Conversations)
Sometimes you’ll want a human agent to take over an ongoing Messenger conversation (for VIP customers, complex cases, sales opportunities, etc.).
Chatislav allows you to pause the AI and respond manually, then hand control back to the bot when you’re done.
-
In the left sidebar, go to "Chats"
-
Click on a specific conversation you want to take over
-
At the top of the conversation, click the "Hand off to human" toggle/icon
- When enabled, the AI agent stops replying
- Any replies you send from the dashboard are treated as human messages
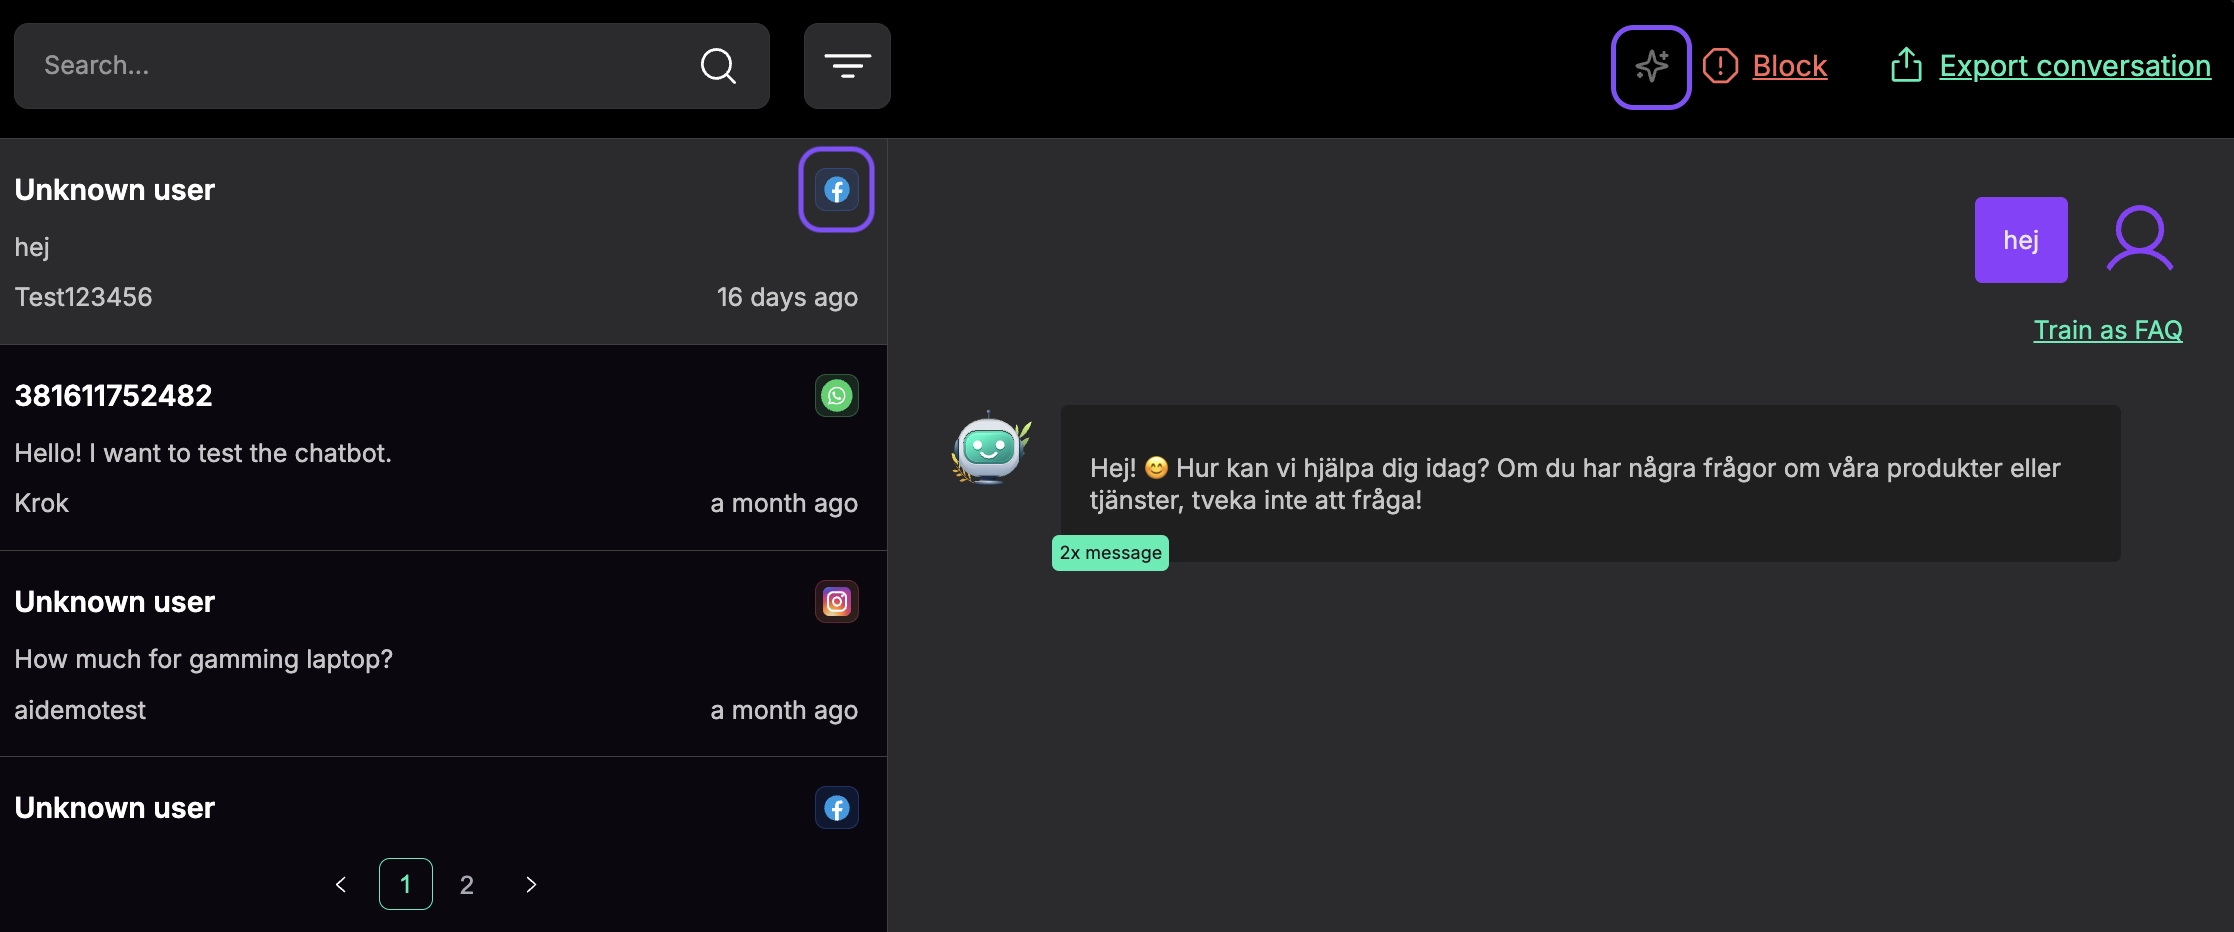
- When you’re finished, click the same toggle/icon again to return control to the AI agent
- New incoming messages will again be handled automatically by the agent
Note: If a Facebook Page integration is removed, you’ll still see past conversations in Chats, but human handoff may no longer be available for those threads because the underlying page integration is disconnected.