Client Side Actions (NEW)
What are Client Side Actions?
Client Side Actions enable your AI Agent to execute JavaScript functions directly within your website or application. When your AI Agent decides that for a current user request, question, or inquiry it needs to perform one or many client-side actions, it can execute the corresponding JavaScript functions in real-time, providing immediate responses and seamless user experiences.
This powerful feature allows the agent to perform interactive tasks like updating the UI, manipulating the DOM, integrating with third-party services, or triggering custom business logic - all without requiring server-side API calls.
Common Client Side Action Examples
- Shopping Cart Management: Add/remove items, update quantities, apply discount codes
- User Interface Updates: Show/hide elements, update content, change styling
- Form Handling: Auto-fill forms, validate input, submit data
- Navigation: Redirect users, open modals, switch tabs
- Payment Processing: Initialize payment flows, handle checkout processes
How to Configure Client Side Agent Action
1. Select your AI Agent, and click on "AI Agent Actions" sidebar item.
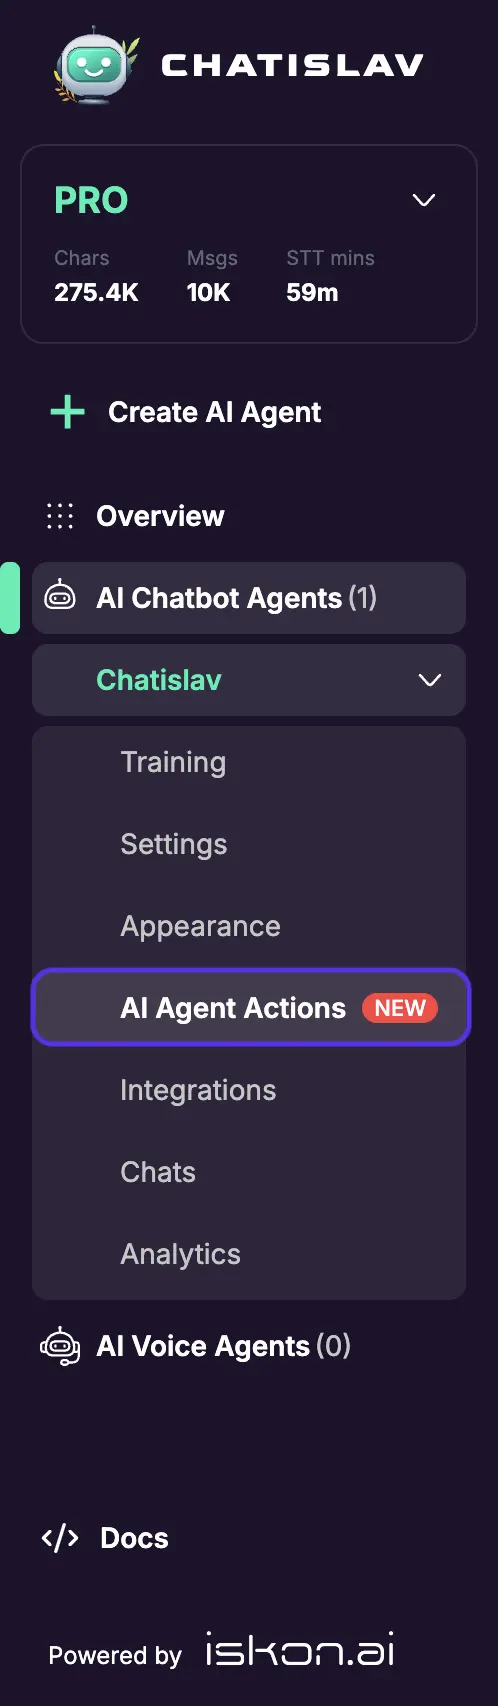
2. Make sure that AI Agent are enabled

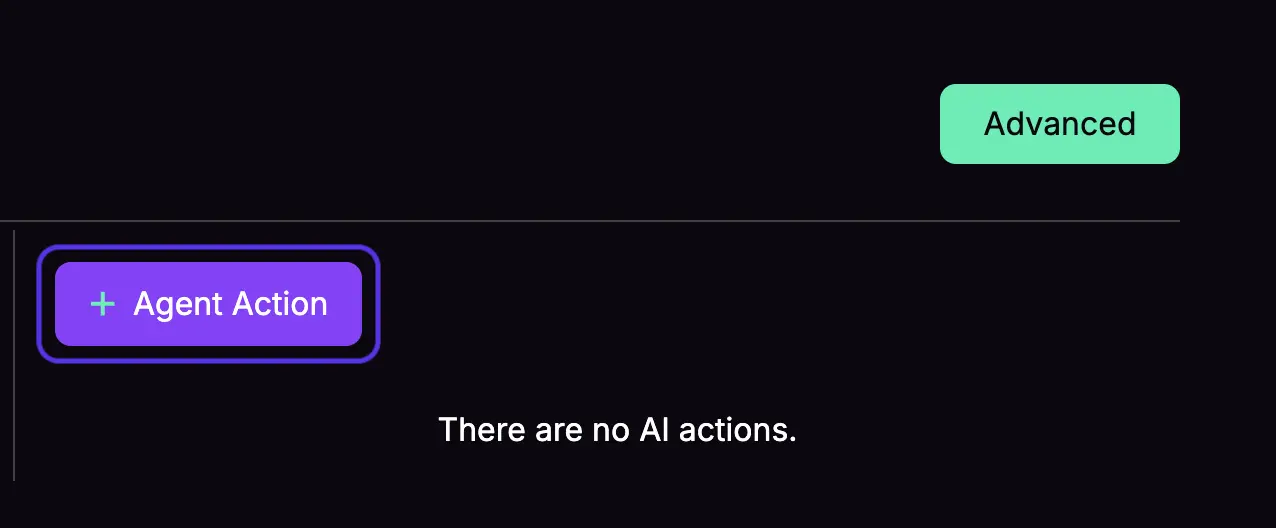
3. Use the "Agent Action" button to set up a new capability for your agent.
4. Choose "Manual action" or choose one of many One-Click integrations like Calendly (more coming soon).
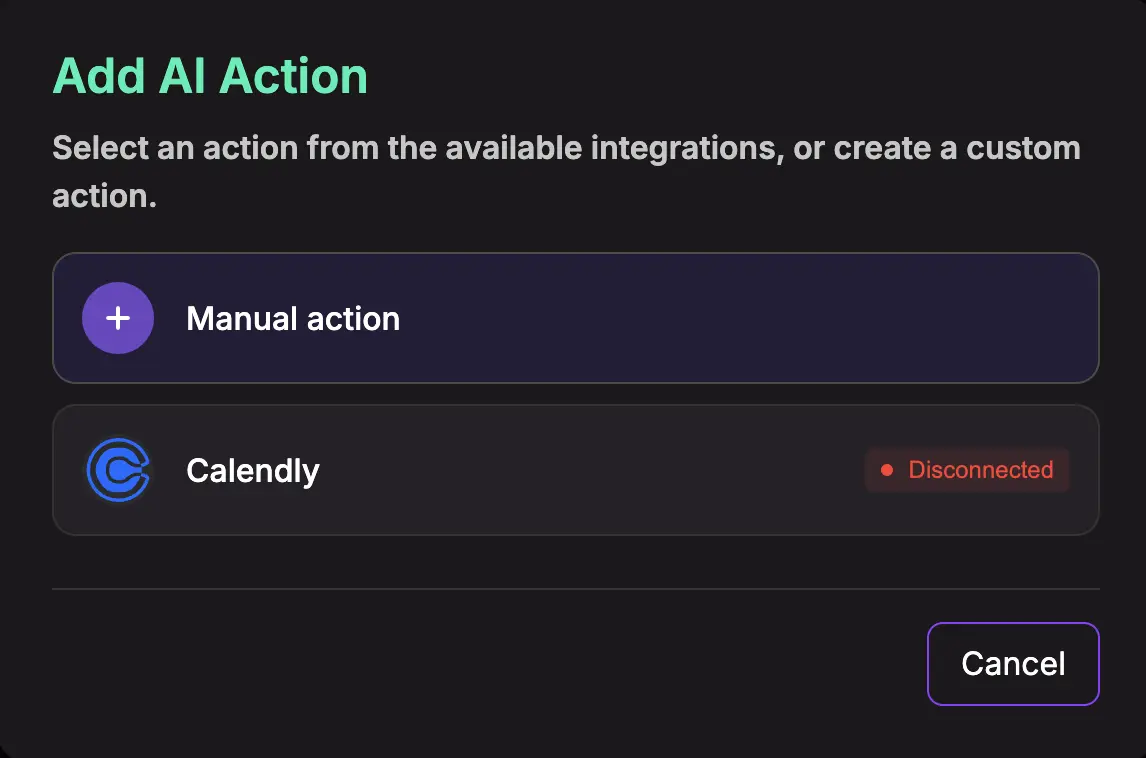
For more details about One-Click integrations go to Integrations section
General Action Settings
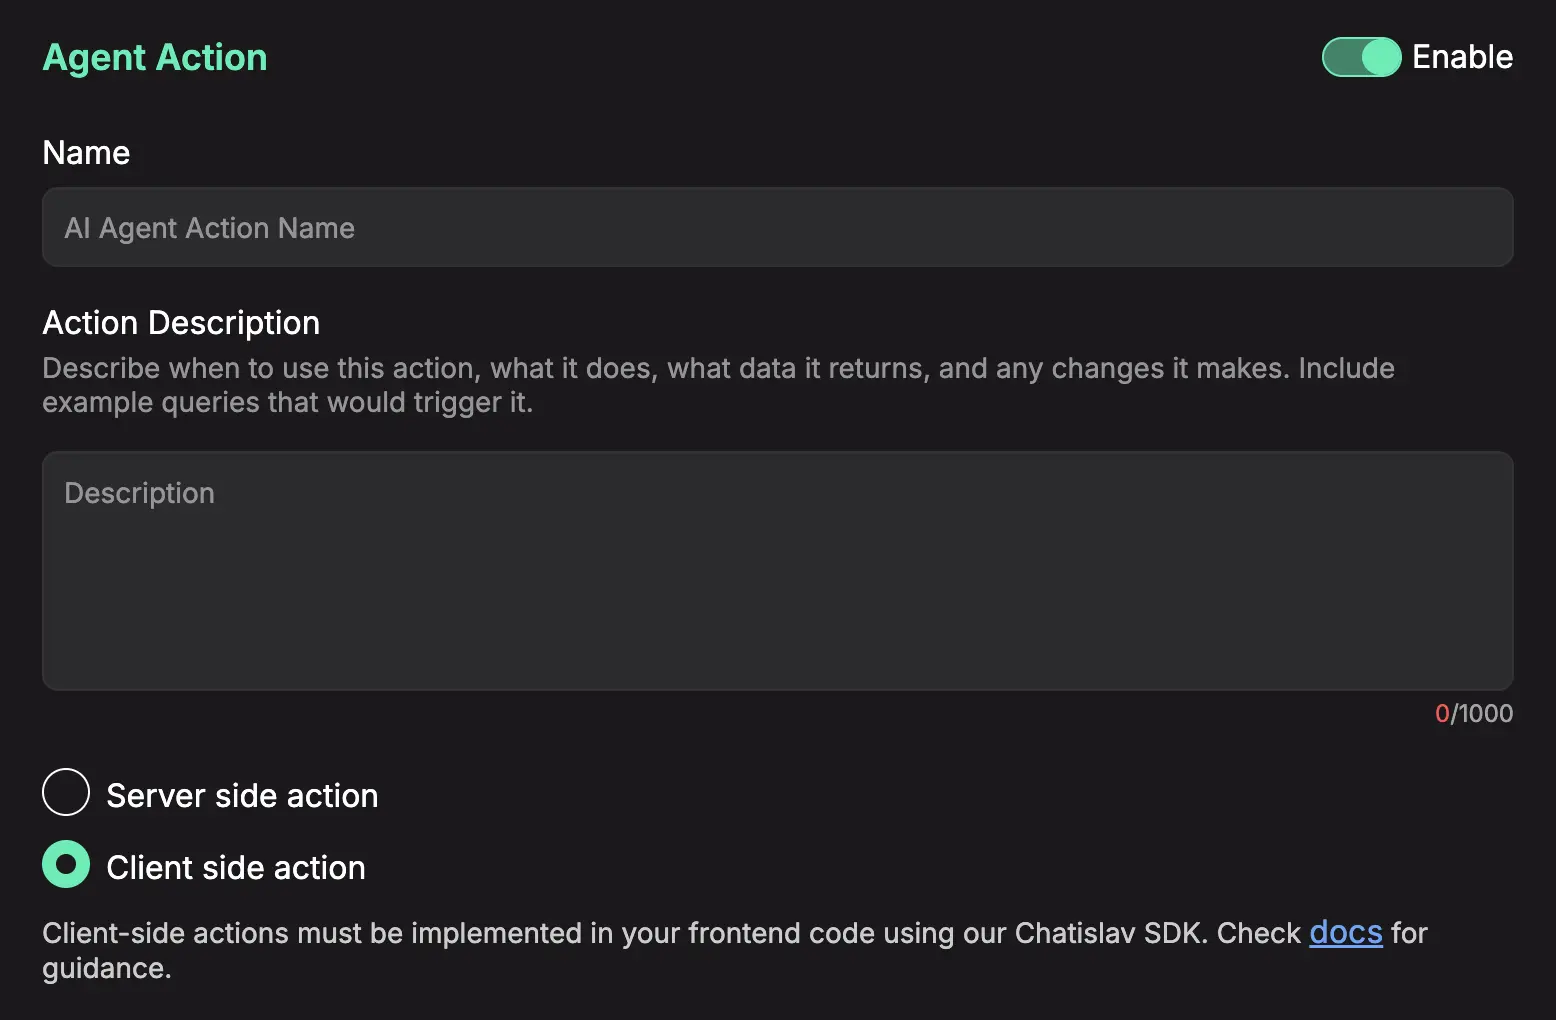
Enable
Wheter action is disabled or enabled.
Name
Give your action a clear, descriptive name that preferably communicate to our AI Agent what that actions is supposed to do.
Example: "get_order_status"
Description
This is a critical field. Describe what the action does in plain English. The AI uses this description to understand when it should use this action.
Good example: Retrieves the current order status
Bad example: order status
Client Side Configuration
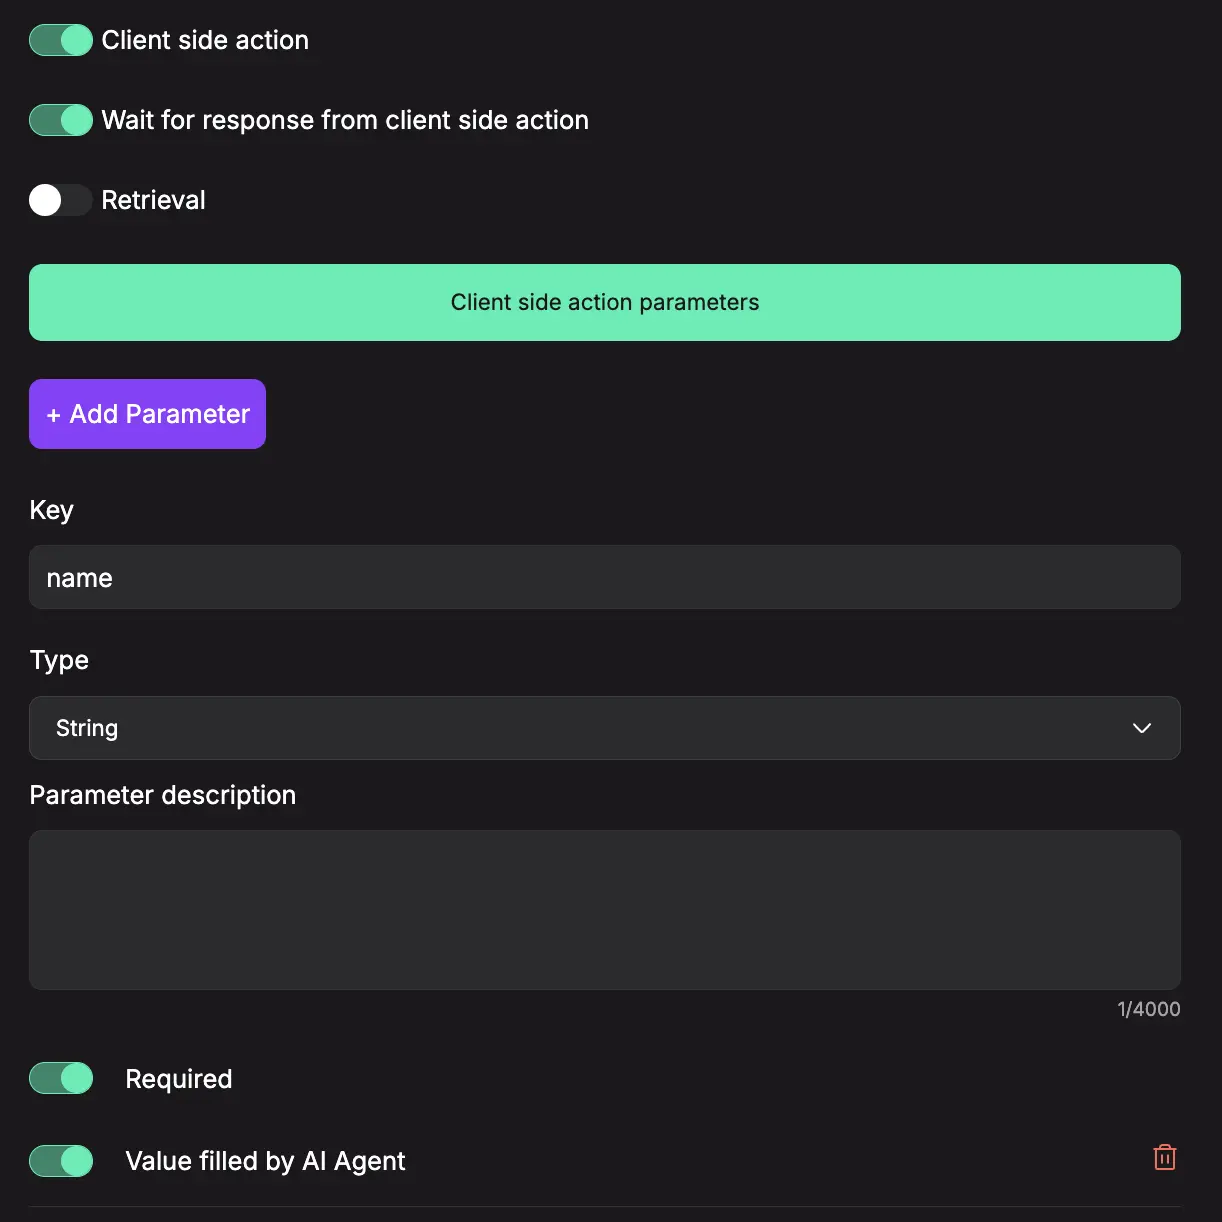
Client side action
This must be enabled for action to be client side.
Wait for response from client side action
This option is used to tell AI Agent to wait for response from client side action
Parameters Configuration
Define the data that will be passed to client side action
Parameters have following configurable fields:
-
Key
The name or identifier for the parameter that will be sent to client side action. For example, "category", "user_id", or "product_name". -
Type
The data type format that the parameter value should follow. Available types include:
- String: Text data
- Number: Numeric values
- Boolean: True/False values
- Enum: A predefined list of allowed values (provided as comma-separated options) - only available when "Value Filled by AI Agent" is enabled
- JSON: Complex structured data (only available when "Value Filled by AI Agent" is enabled)
-
Value
The actual data content that will be sent for this parameter to client side action. This is the specific information (like "shoes", "12345") that gets transmitted to client side action -
Required
A toggle that indicates whether AI Agent must populate parameter. -
Value Filled by AI Agent
A setting that instructs an AI agent to automatically populate this parameter's value in runtime based on context. This setting also unlocks the JSON type option for Body parameters and the Enum type option. -
Parameter Description
Explanation of what this parameter does, what kind of data it expects, and how it's used by client side action. This serves as documentation to help AI Agent understand the purpose and format requirements for the parameter. -
JSON Schema
An additional field that appears when JSON type is selected. This allows you to define the structure and validation rules for the JSON data, specifying what properties are expected, their types, and any constraints on the JSON object that will be sent.
How to Register Client Side Actions
You can register client side actions in two ways:
1. Global Registration (All Widgets)
Use the register_actions method on the global chatislav object (or chatislav_voice for voice widgets) to register actions for all chat widgets on your page:
window.chatislav.register_actions({
  add_to_cart: function(args, user) {
    const { product_id, quantity = 1 } = args;

    // Your cart logic here
    addProductToCart(product_id, quantity);

    return {
      success: true,
      message: `Added ${quantity} item(s) to cart`,
      data: {
        cart_total: getCartTotal(),
        items_count: getCartItemCount()
      }
    };
  },

  apply_discount: function(args, user) {
    const { discount_code } = args;

    const discount = validateDiscount(discount_code);
    if (discount.valid) {
      applyDiscountToCart(discount);
      return {
        success: true,
        message: `Discount ${discount_code} applied! You saved $${discount.amount}`,
        data: {
          discount_amount: discount.amount,
          new_total: getCartTotal()
        }
      };
    } else {
      return {
        success: false,
        message: "Invalid discount code"
      };
    }
  }
});
2. Instance-Specific Registration (Specific Widget)
Register actions for a specific chat widget by providing the instance ID as the second parameter:
// Register actions for a specific chat instance
window.chatislav.register_actions({
  send_email: function(args, user, instance_id) {
    const { to, subject, body } = args;

    // Email sending logic specific to this widget
    sendEmailFromWidget(to, subject, body, instance_id);

    return {
      success: true,
      message: `Email sent to ${to} successfully`,
      data: {
        email_id: generateEmailId(),
        sent_at: new Date().toISOString()
      }
    };
  },

  chat_specific_action: function(args, user) {
    // Action that only applies to this specific chat widget
    return {
      success: true,
      message: "Chat-specific action executed",
      data: {
        action_type: "chat_specific",
        executed_at: Date.now()
      }
    };
  }
}, "chat-widget-1");
When to Use Each Method:
- Global Registration: Use when actions should be available across all chat widgets on your page
- Instance-Specific Registration: Use when you have multiple chat widgets with different purposes and need actions that only apply to specific widgets
Action Function Parameters
Each action function receives the following parameters:
1. args (Object) - Contains parameters sent by the AI Agent
2. user (Object) - Contains user session information (see User Session Identity for details)
3. instance_id (String) - The unique identifier of the chat widget instance that triggered the action
window.chatislav.register_actions({
  personalized_greeting: function(args, user, instance_id) {
    console.log('Action triggered by widget:', instance_id);

    if (user && user.user_metadata) {
      const userName = user.user_metadata.name || 'there';
      return {
        success: true,
        message: `Hello ${userName}! Welcome back.`,
        data: {
          user_name: userName,
          widget_id: instance_id
        }
      };
    }
    return {
      success: true,
      message: "Hello! Welcome to our site.",
      data: {
        widget_id: instance_id
      }
    };
  }
});
Return Values
Action functions should return an object that the AI Agent can understand:
Success Response:
return {
  success: true,
  message: "Action completed successfully",
  data: { /* any additional data */ }
};
Error Response:
return {
  success: false,
  message: "Error description for the user"
};
Asynchronous Actions
Client Side Actions support both synchronous and asynchronous operations:
window.chatislav.register_actions({
  // Synchronous action
  toggle_theme: function(args, user, instance_id) {
    document.body.classList.toggle('dark-theme');
    const isDark = document.body.classList.contains('dark-theme');
    return {
      success: true,
      message: "Theme toggled",
      data: {
        theme: isDark ? 'dark' : 'light'
      }
    };
  },

  // Asynchronous action
  fetch_user_data: async function(args, user, instance_id) {
    try {
      const response = await fetch('/api/user-profile');
      const userData = await response.json();
      updateUserProfile(userData);

      return {
        success: true,
        message: "Profile updated successfully",
        data: {
          user_profile: userData,
          updated_at: new Date().toISOString()
        }
      };
    } catch (error) {
      return {
        success: false,
        message: "Failed to fetch user data"
      };
    }
  }
});
E-commerce Integration Example
window.chatislav.register_actions({
  add_to_cart: function(args, user, instance_id) {
    const { product_id, quantity = 1 } = args;

    try {
      const cart = addToCart({ product_id, quantity, user_id: user?.user_id });
      updateCartDisplay(cart);
      showNotification('Item added to cart!', 'success');

      return {
        success: true,
        message: `Added ${quantity} item(s) to your cart`,
        data: {
          cart_summary: {
            total_items: cart.items.length,
            total: cart.total
          },
          added_item: {
            product_id,
            quantity
          }
        }
      };
    } catch (error) {
      return {
        success: false,
        message: "Failed to add item to cart"
      };
    }
  },

  start_checkout: function(args, user, instance_id) {
    const cart = getCart();

    if (cart.items.length === 0) {
      return {
        success: false,
        message: "Your cart is empty. Add some items before checkout."
      };
    }

    window.location.href = '/checkout';
    return {
      success: true,
      message: "Redirecting to checkout...",
      data: {
        redirect_url: '/checkout',
        cart_value: cart.total
      }
    };
  }
});
Voice Widget Support
Coming Soon
Multi-Widget Example
Here's an example of how to handle multiple chat widgets with different purposes:
// Global actions available to all widgets
window.chatislav.register_actions({
  get_current_time: function(args, user, instance_id) {
    const currentTime = new Date().toLocaleTimeString();
    return {
      success: true,
      message: `Current time: ${currentTime}`,
      data: {
        timestamp: Date.now(),
        formatted_time: currentTime
      }
    };
  }
});

// Support widget specific actions
window.chatislav.register_actions({
  create_support_ticket: function(args, user, instance_id) {
    const { issue_type, description } = args;
    const ticketId = createSupportTicket(issue_type, description, user);
    return {
      success: true,
      message: `Support ticket #${ticketId} created successfully`,
      data: {
        ticket_id: ticketId,
        issue_type,
        created_at: new Date().toISOString()
      }
    };
  }
}, "support-widget");

// Sales widget specific actions
window.chatislav.register_actions({
  schedule_demo: function(args, user, instance_id) {
    const { preferred_date, contact_info } = args;
    const demoId = scheduleSalesDemo(preferred_date, contact_info);
    return {
      success: true,
      message: `Demo scheduled! Reference ID: ${demoId}`,
      data: {
        demo_id: demoId,
        scheduled_date: preferred_date,
        contact_info
      }
    };
  }
}, "sales-widget");
Error Handling
Always implement proper error handling:
window.chatislav.register_actions({
  process_payment: function(args, user, instance_id) {
    try {
      const { amount, payment_method } = args;

      if (!amount || amount <= 0) {
        return { success: false, message: "Invalid payment amount" };
      }

      const result = processPayment(amount, payment_method);
      return {
        success: true,
        message: `Payment of $${amount} processed successfully`,
        data: {
          payment_result: result,
          amount,
          payment_method,
          processed_at: new Date().toISOString()
        }
      };

    } catch (error) {
      console.error('Payment processing error:', error);
      return {
        success: false,
        message: "Payment processing failed. Please try again."
      };
    }
  }
});
Best Practices
1. Validate Inputs - Always validate and sanitize the args parameter
2. Handle Errors Gracefully - Wrap action logic in try-catch blocks
3. Keep Actions Simple - Each action should have a single, clear purpose
4. Return Meaningful Data - Provide detailed success/error messages
5. Update UI Appropriately - Ensure all related UI elements are updated
6. Test Thoroughly - Test actions with various inputs and edge cases
7. Use Instance-Specific Registration - When you have multiple widgets with different purposes, use instance-specific registration to avoid conflicts
8. Utilize the Instance ID - Use the instance_id parameter to differentiate behavior when the same action is registered globally