Fine-tune the appearance of Your Agents
Personalize Your Agent's Visual Identity
Creating a unique and engaging user experience starts with customizing the appearance of your chat agents. Tailoring your chat interface not only enhances brand identity but also improves user interaction. Chatislav provides comprehensive customization options to ensure your agent aligns perfectly with your brand.
- From the side menu, select the agent whose appearance you want to customize and click Appearance
Brand Identity Customization
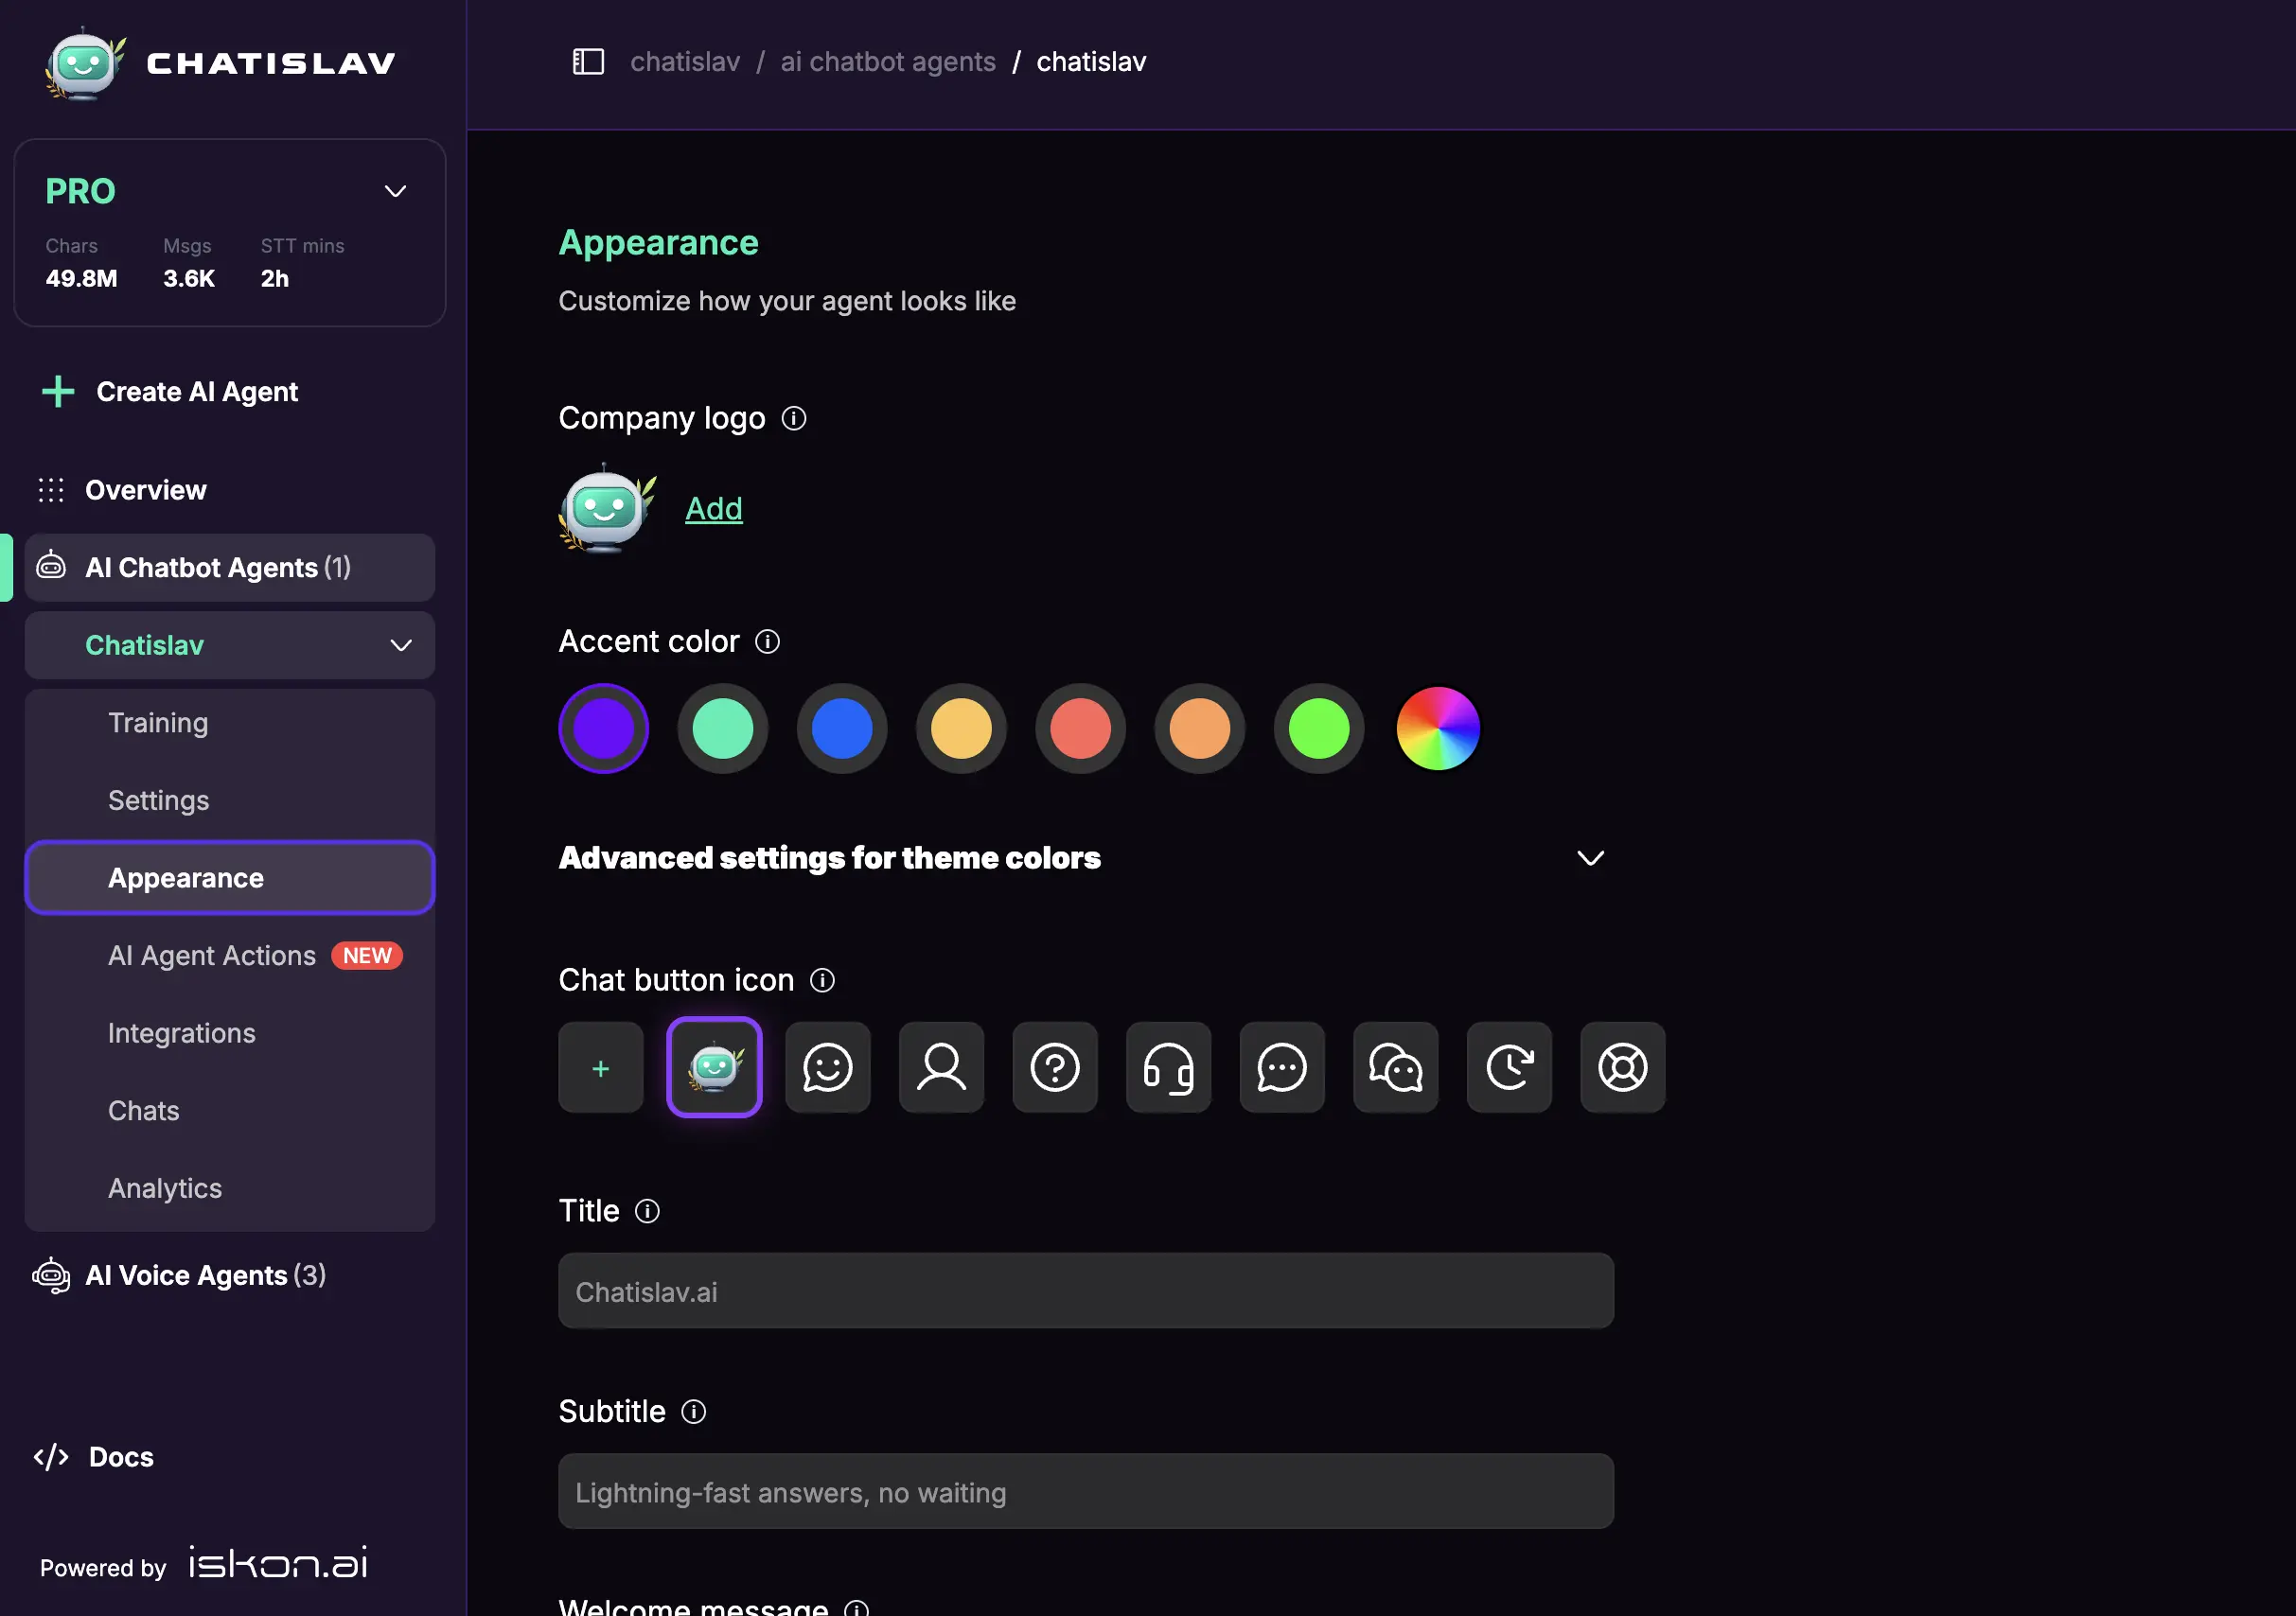
Company Logo
Upload your brand logo for instant recognition in the chat window header. You can crop or resize the image for optimal visual appeal.
Color Scheme
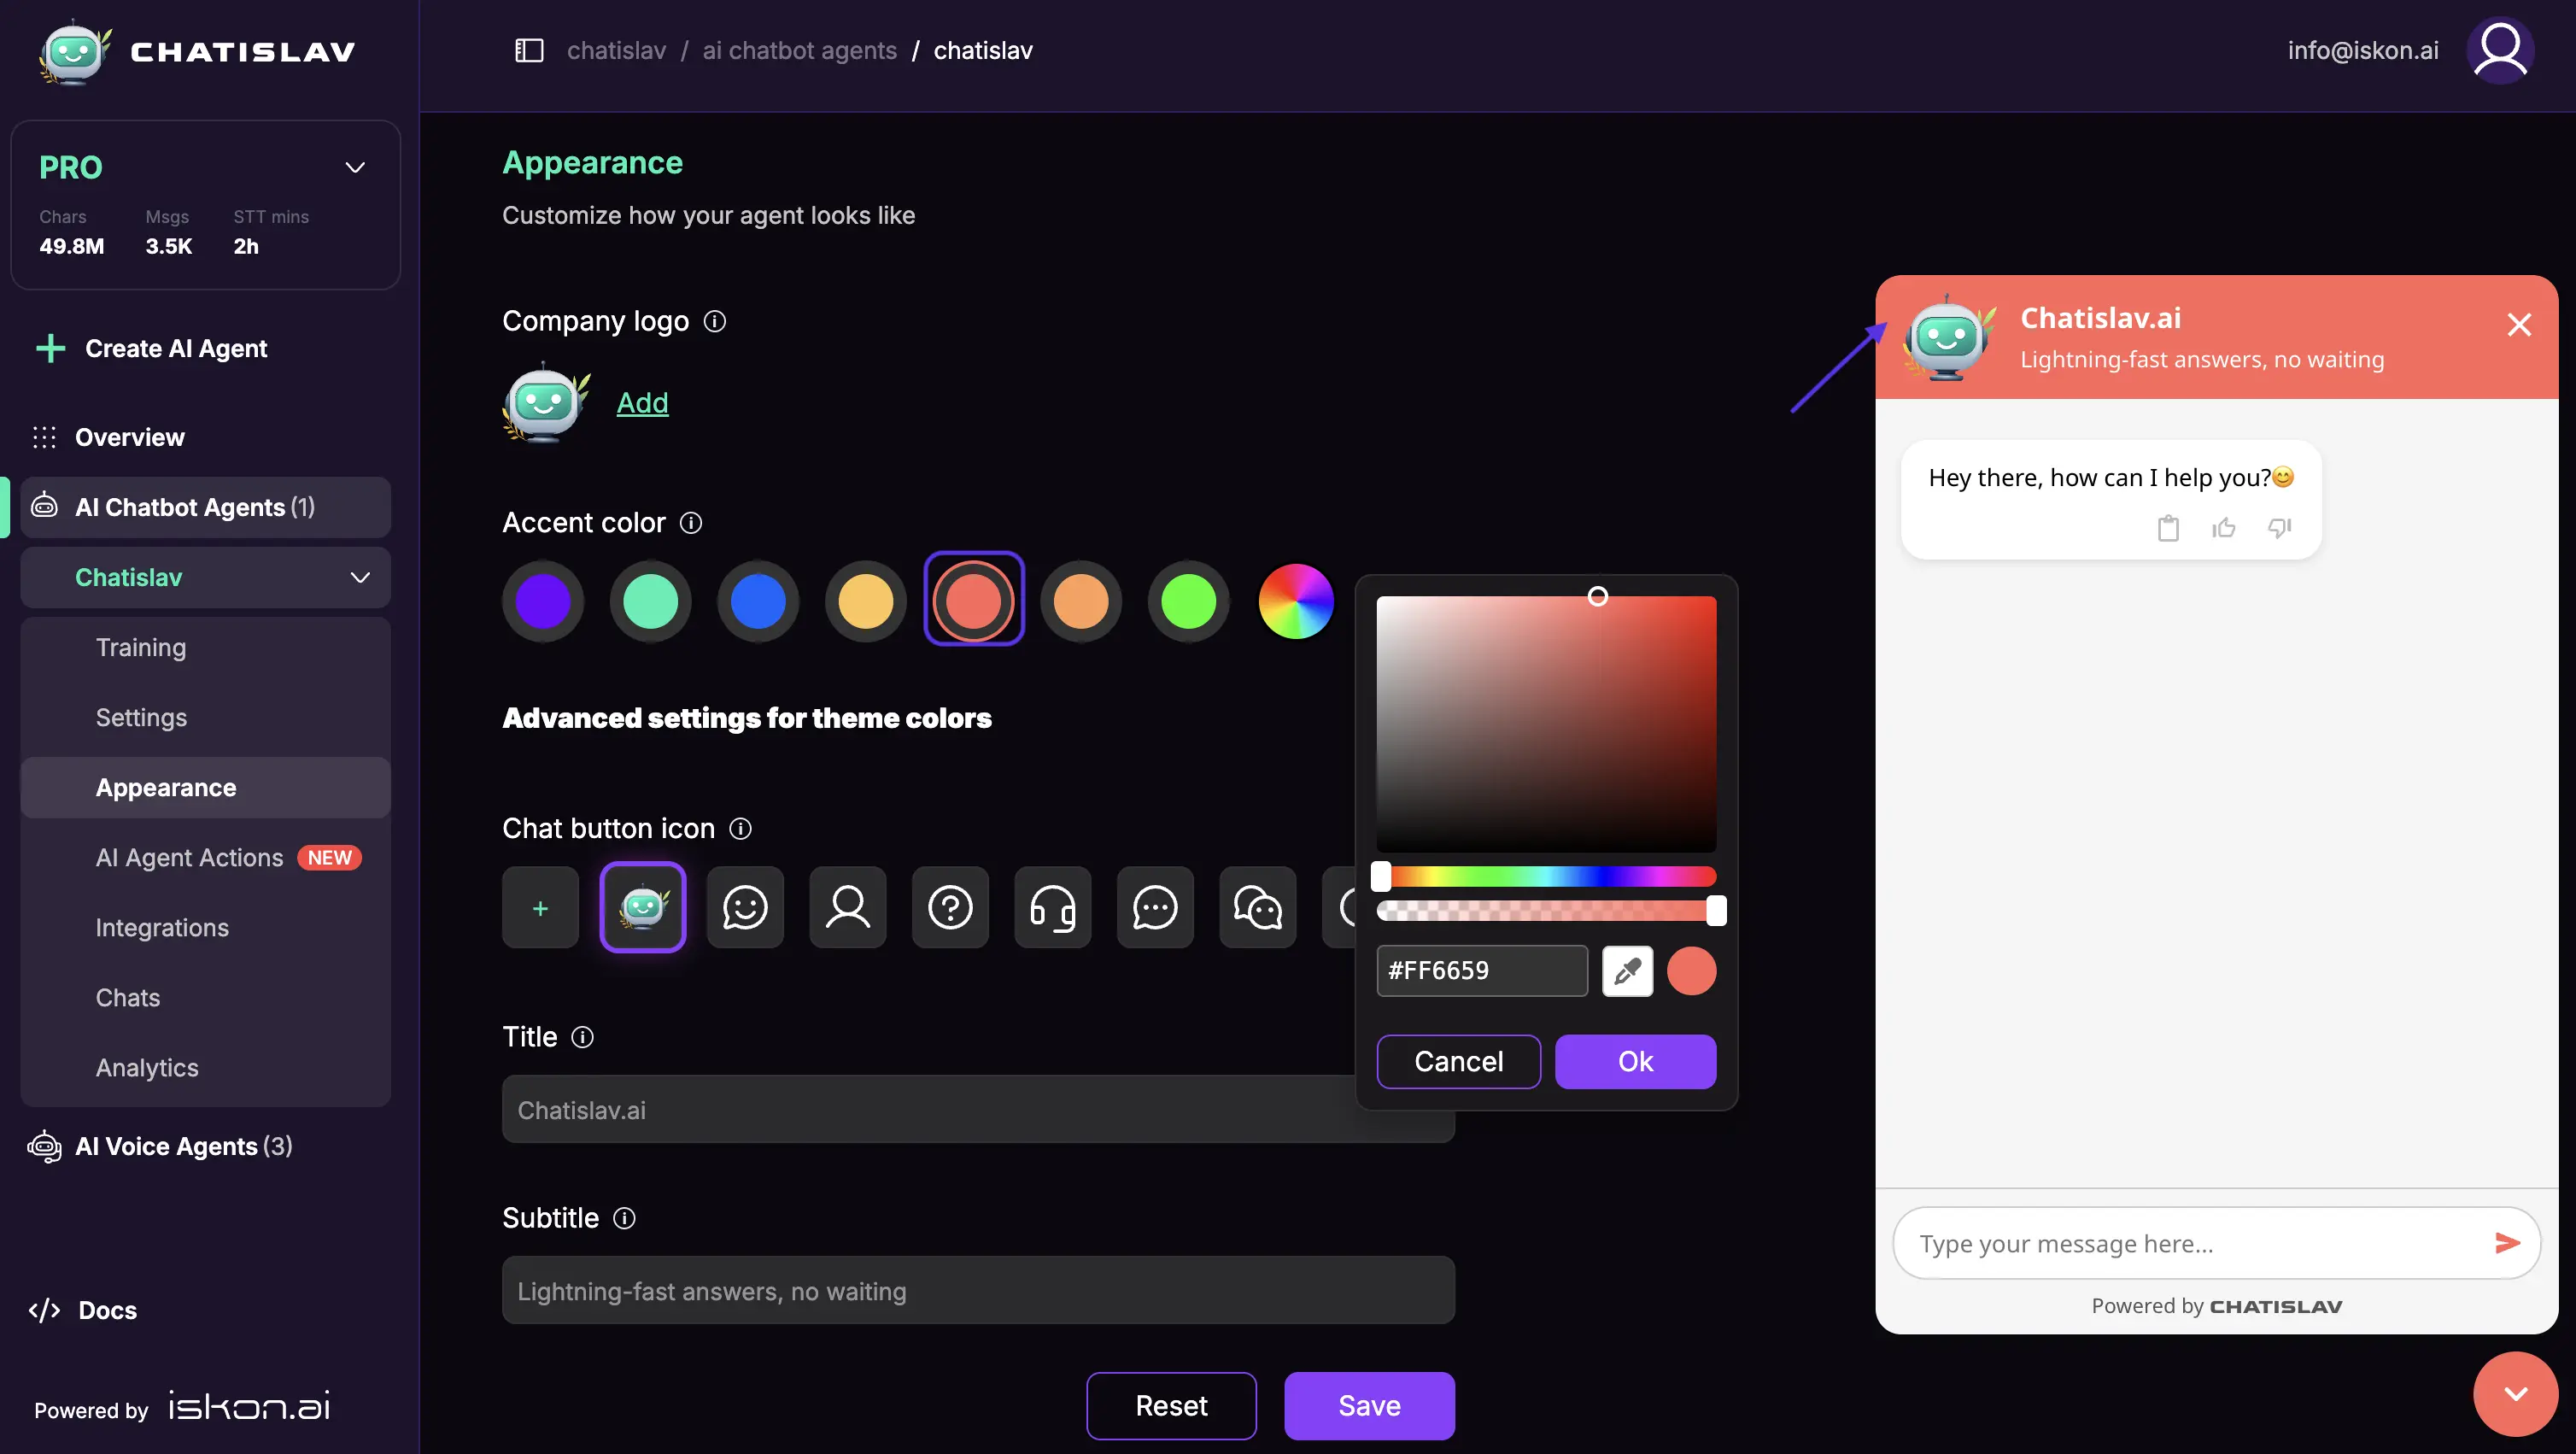
Primary Accent Color
Select a color that complements your brand's palette to customize the accent elements in the chat window. Options include predefined colors, hex codes, a color palette, transparency adjustments, or a color picker for precise matching.
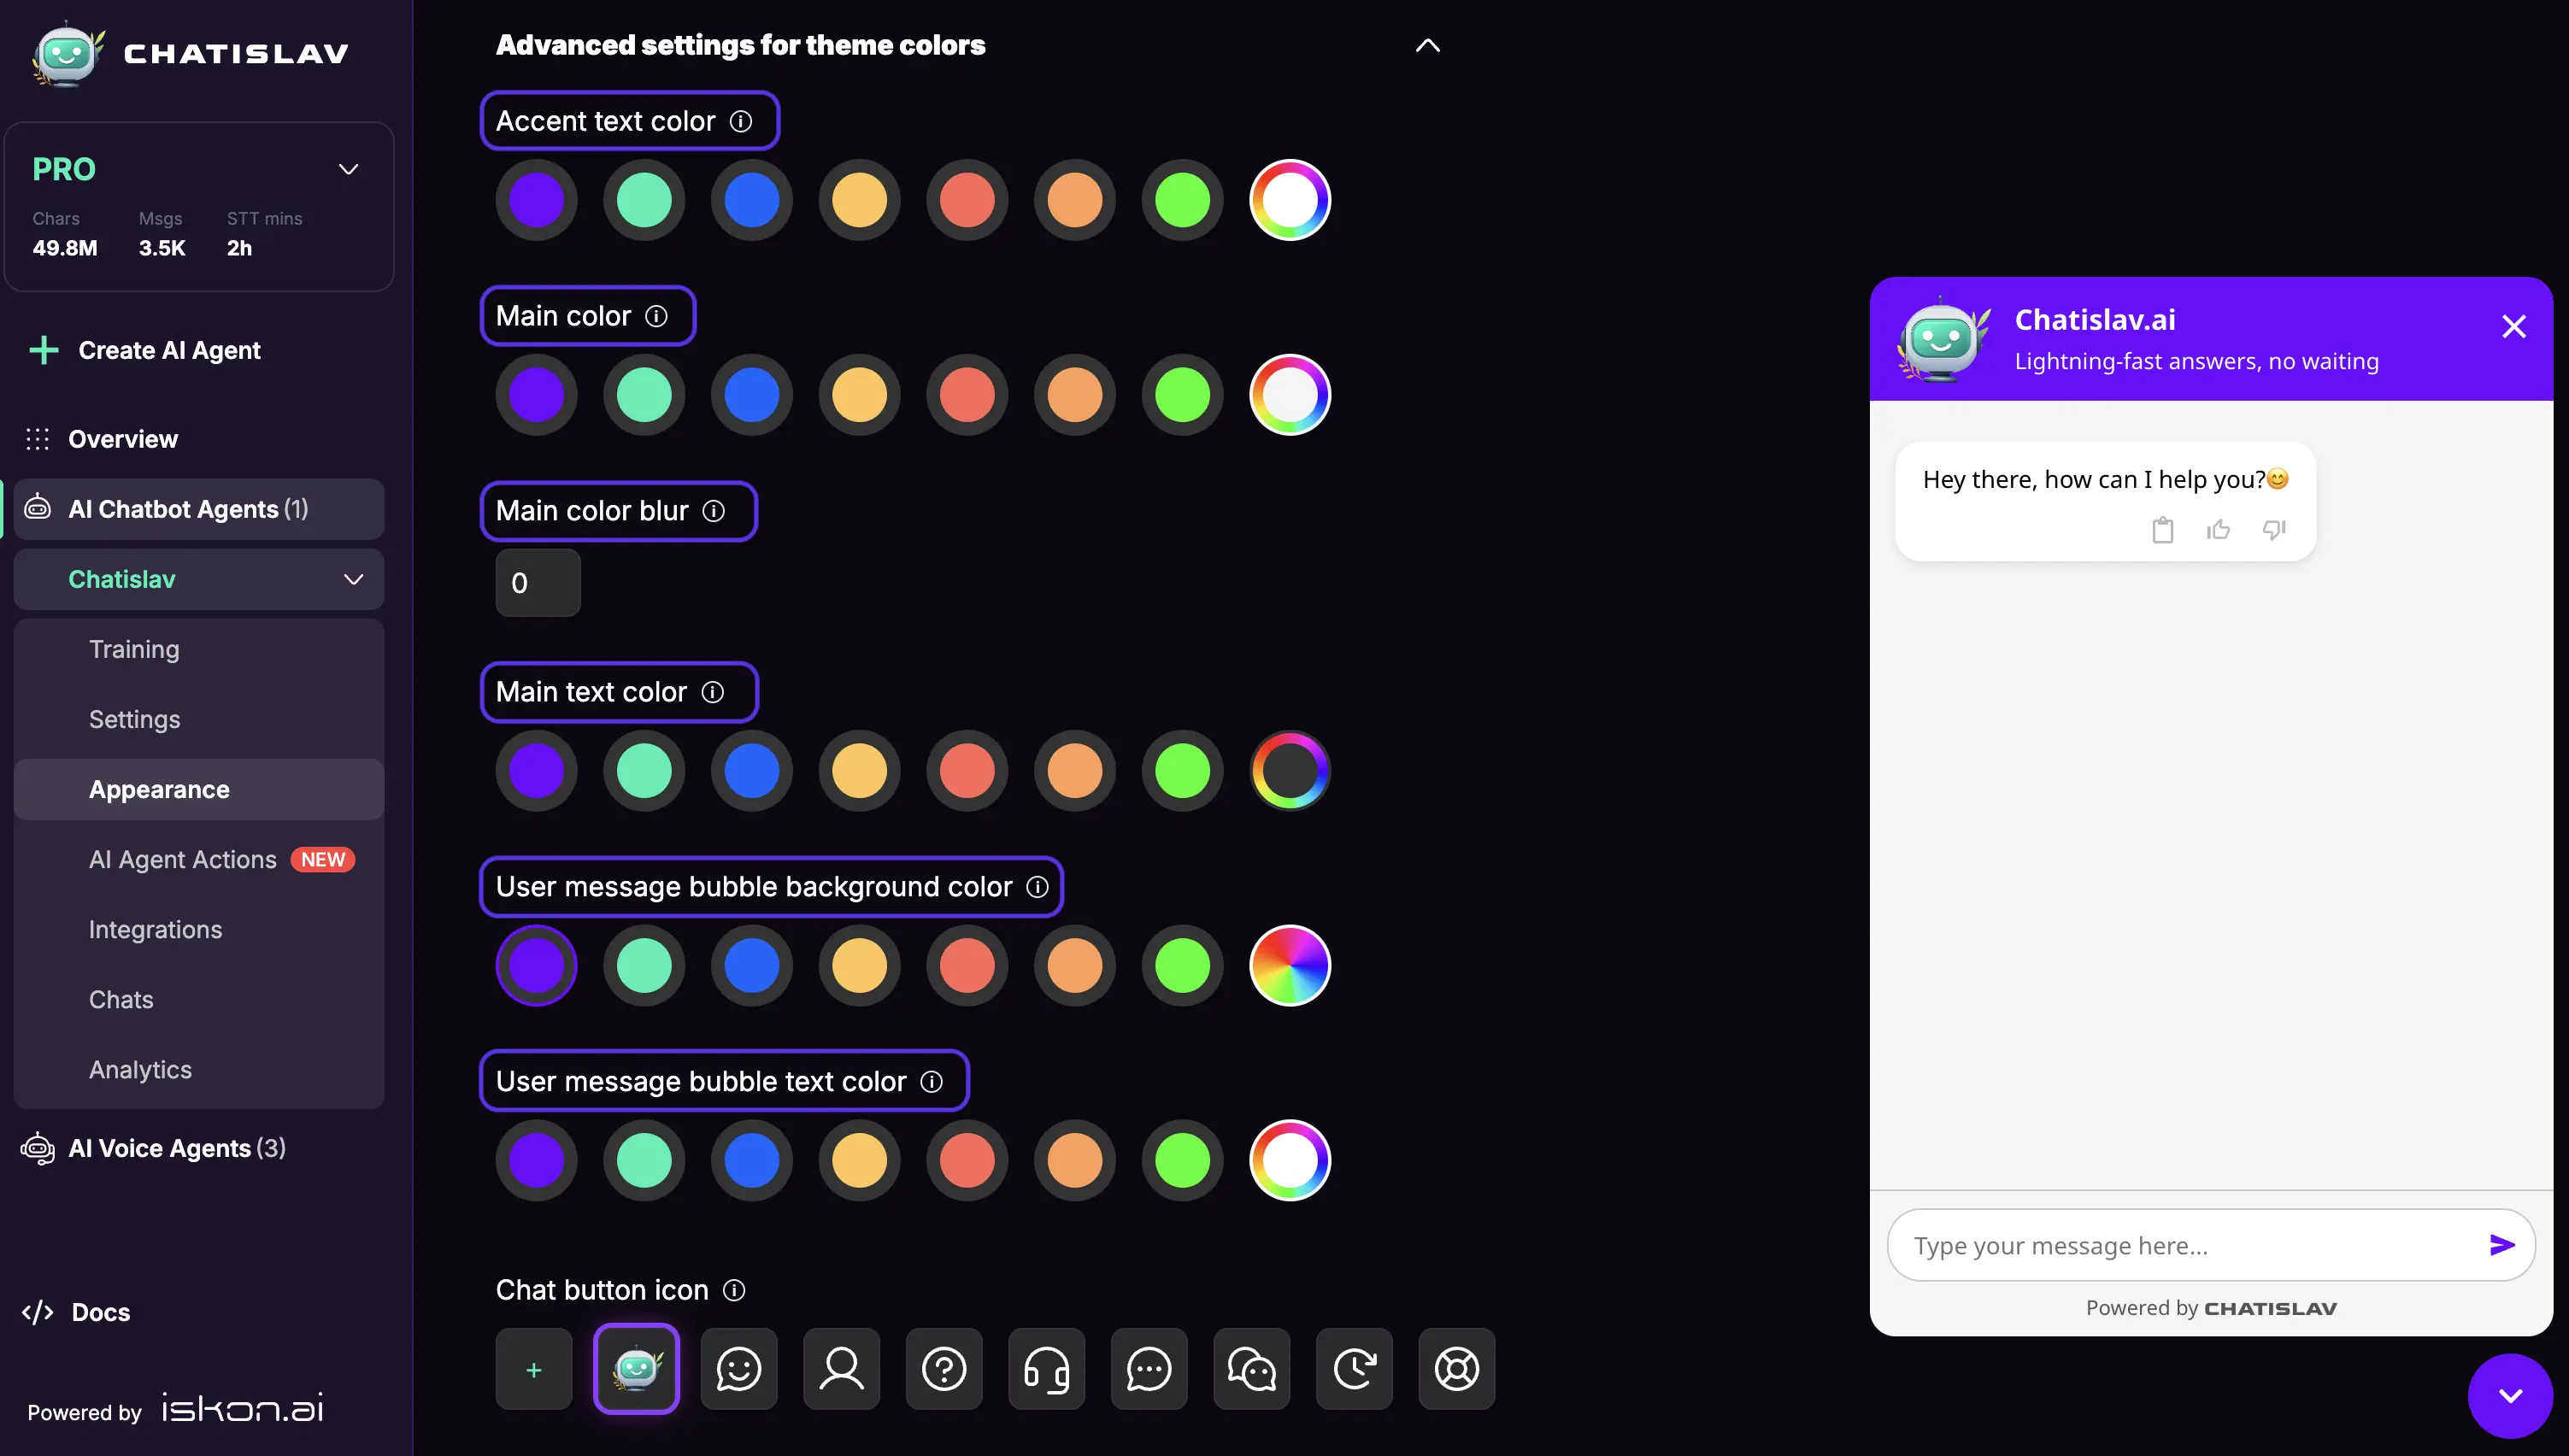
Advanced Color Settings
Get a polished look by fine-tuning your color scheme in "Advanced settings for theme colors":
- Accent Text Color: Customize text color on accent elements
- Main Color: Set the primary background color for the chat interface
- Main Color Blur: Adjust blur effect intensity
- Main Text Color: Define primary text color throughout the interface
- User Bubble Color: Customize the color of user message bubbles
- User Bubble Text Color: Set text color within user message bubbles
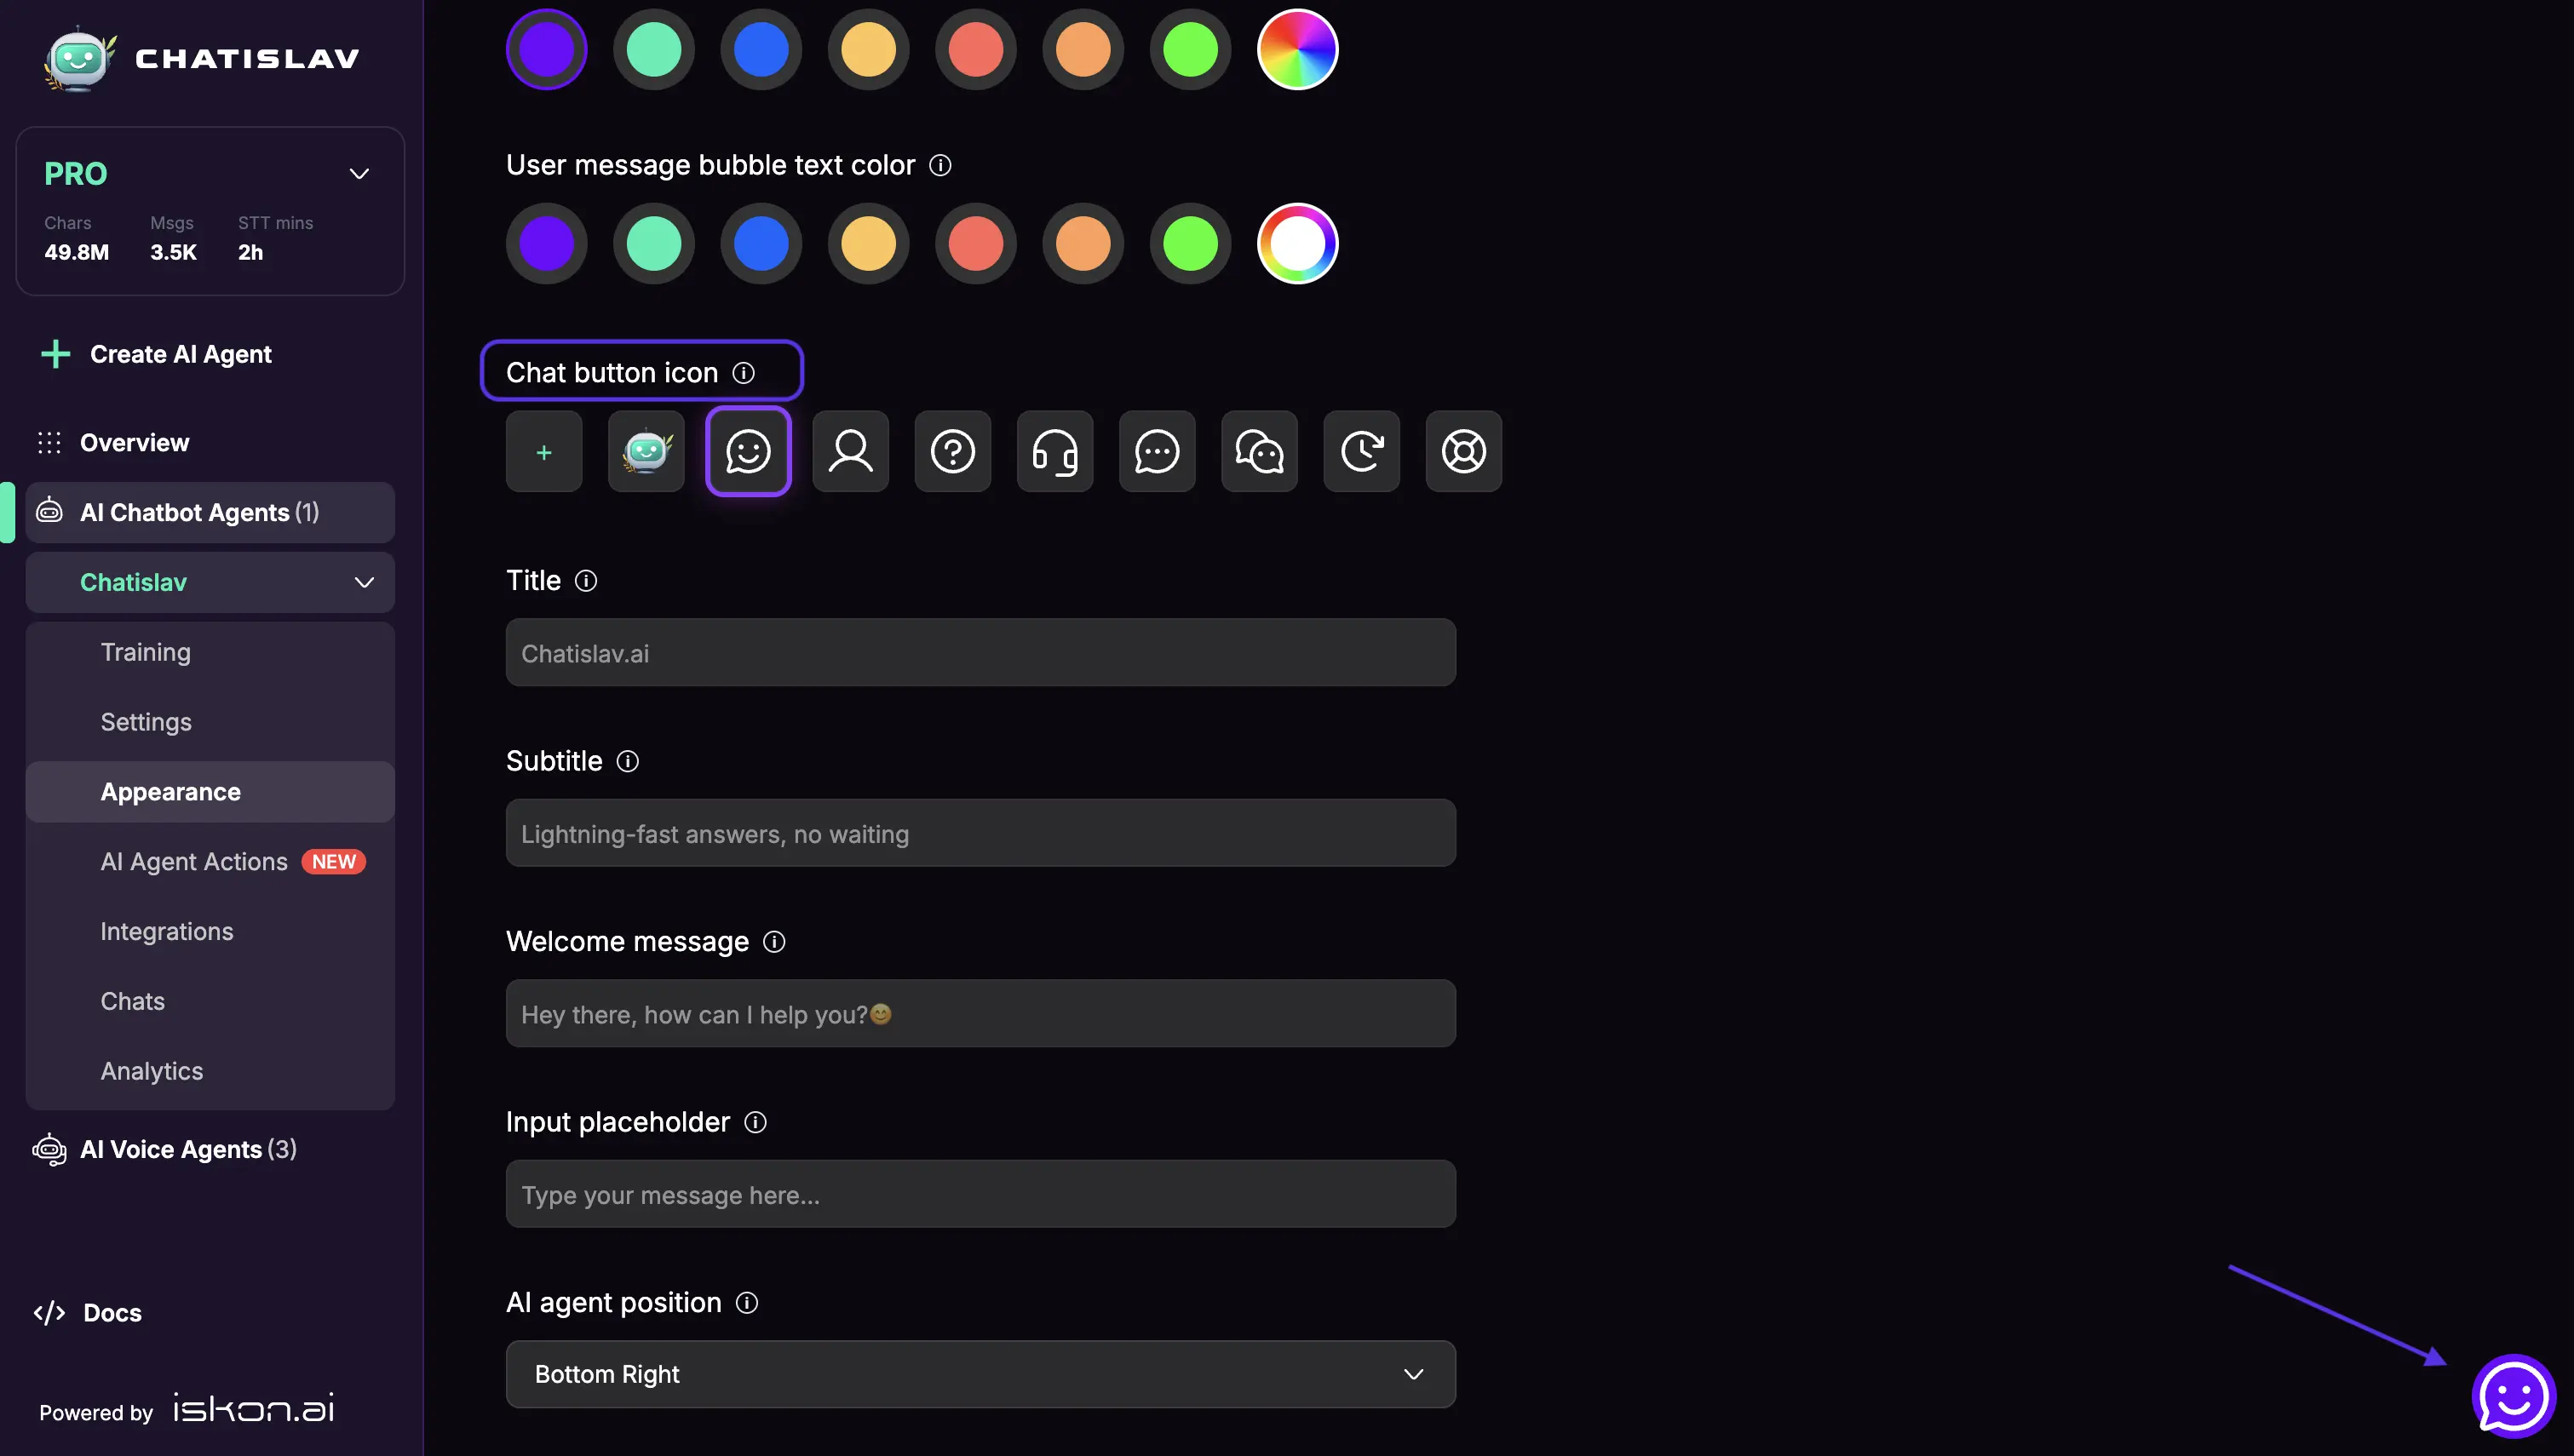
Chat Button Icon
Personalize the icon that users click to initiate chat by selecting from provided shapes or importing your own custom icon.
We recommend that these elements be carefully selected to align with your brand identity and to meet the needs and preferences of your target audience.
Text and Messaging Configuration
Chat Interface Text Settings
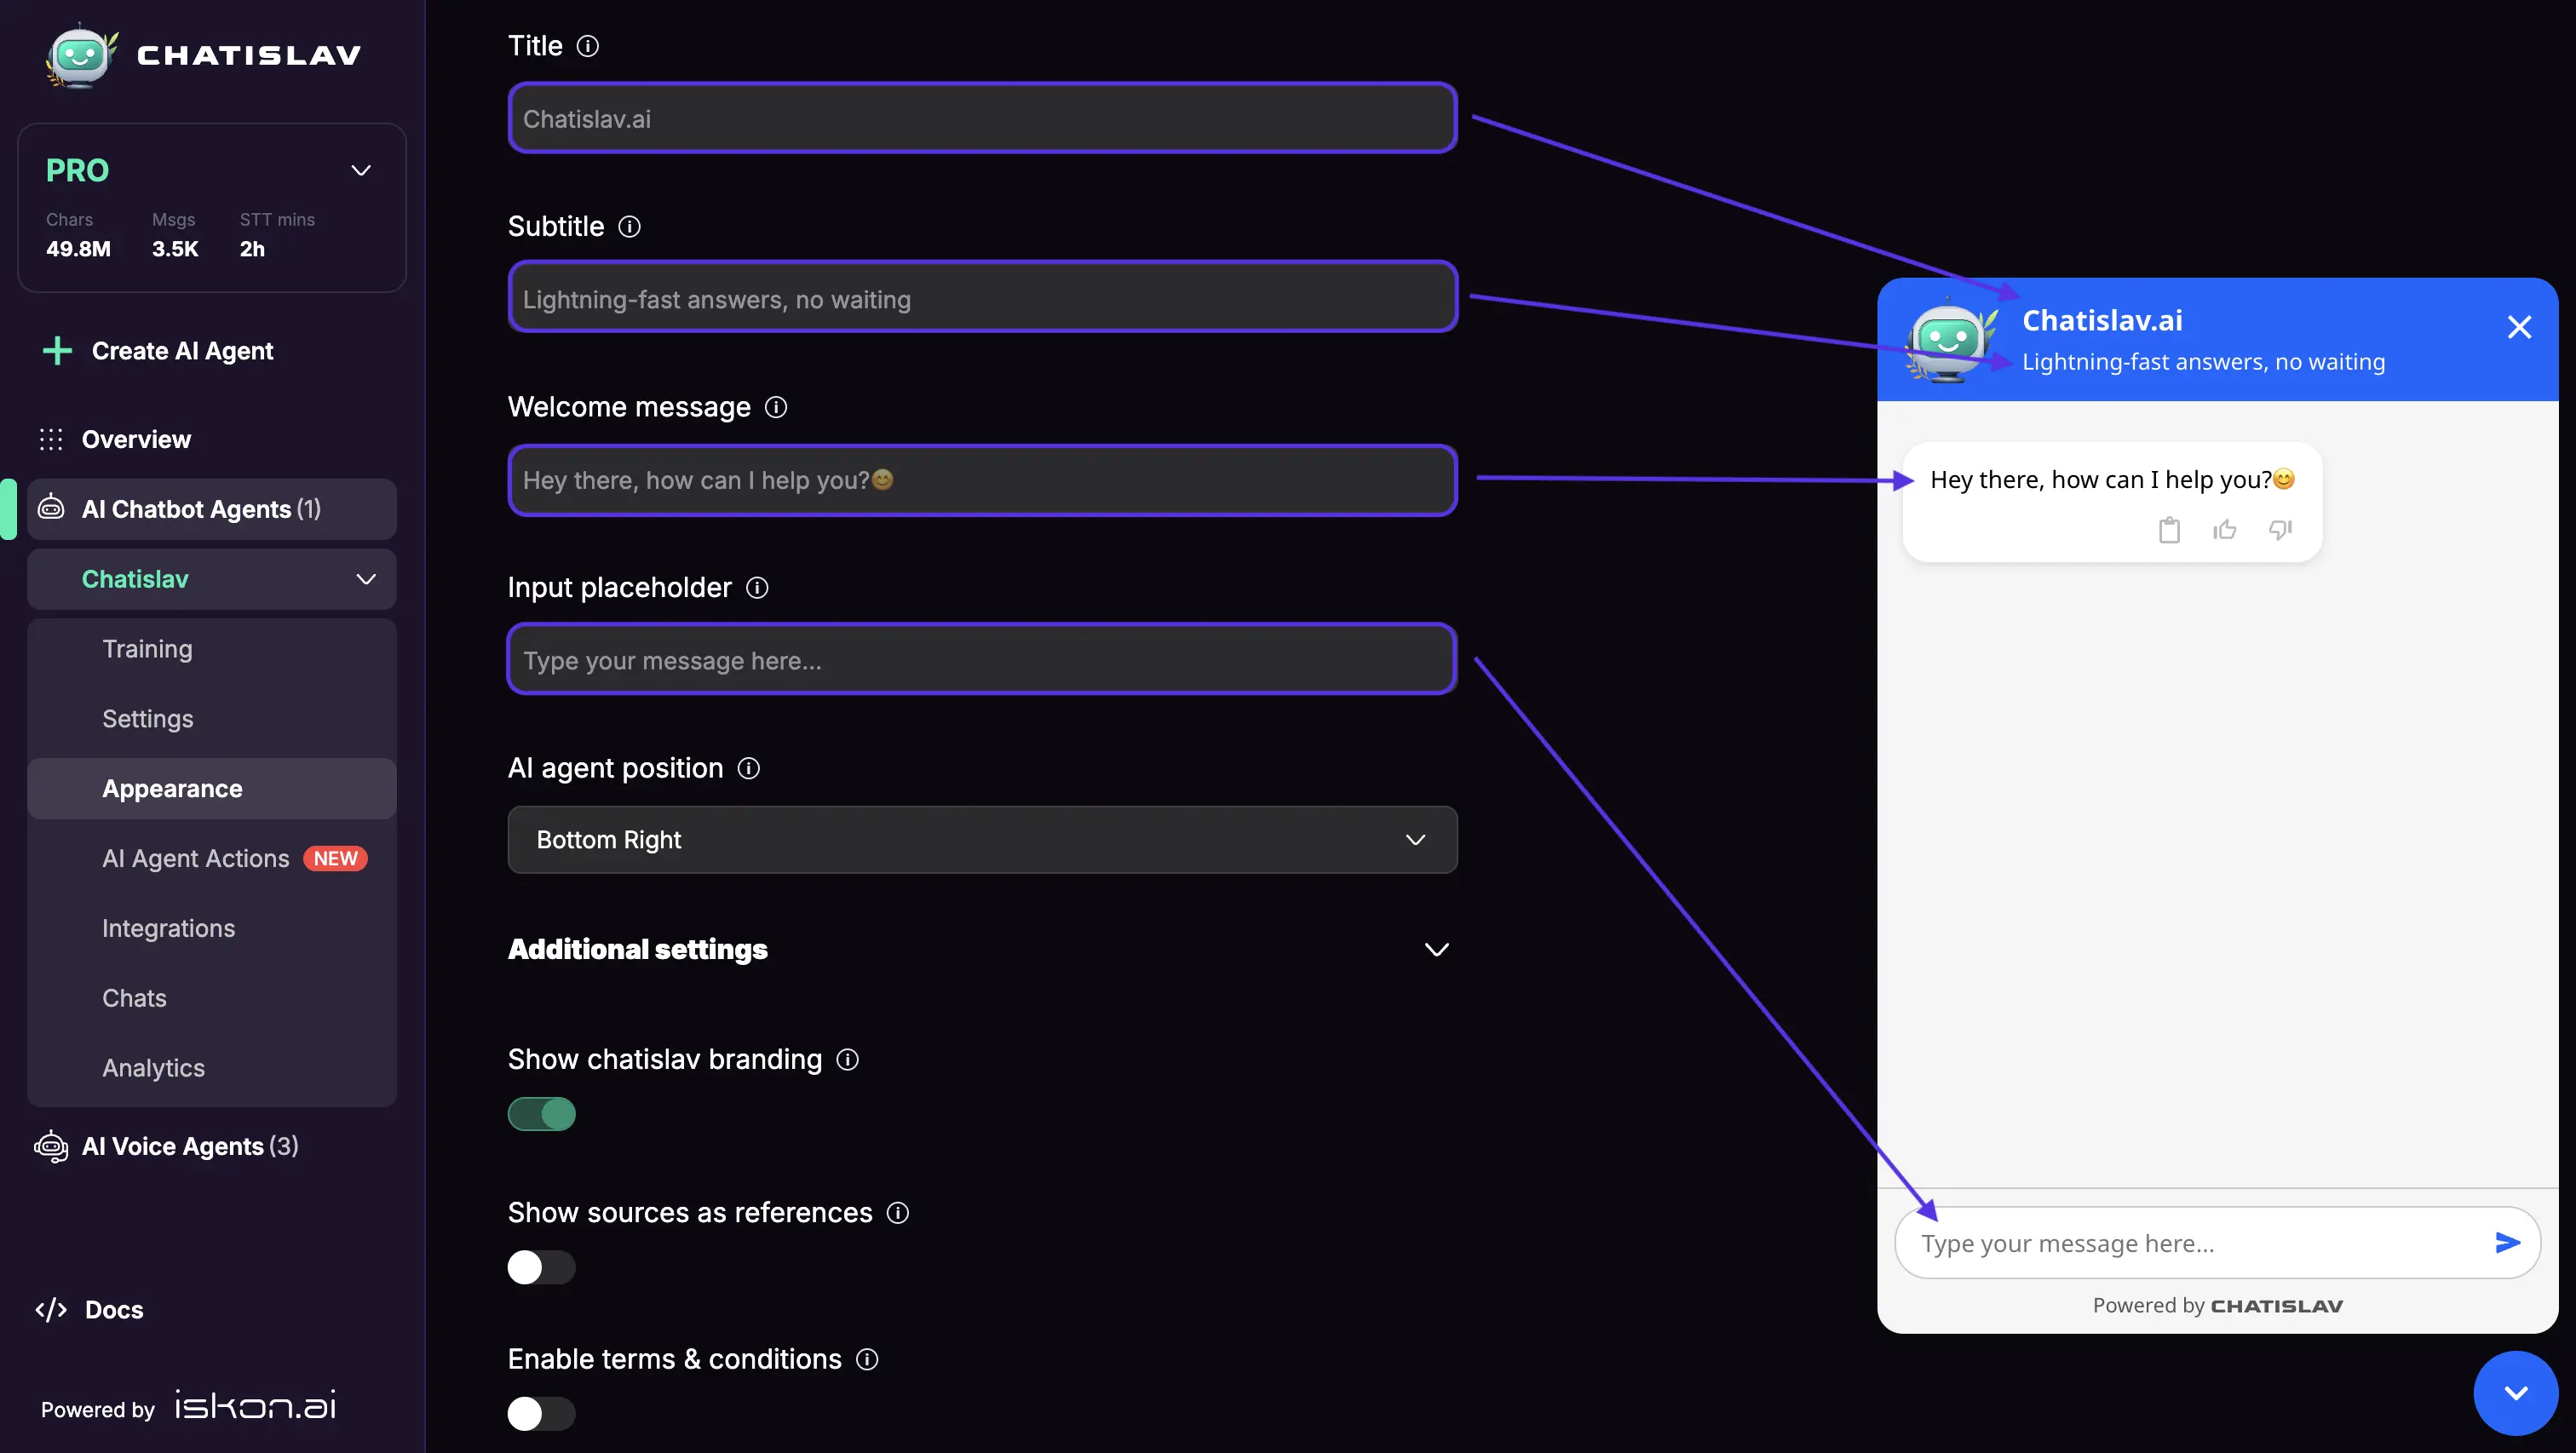
Chat Bubble Title
- Customize the main title displayed in your chat interface
- Defaults to your company name if not specified
Subtitle
- Add a brief description to clearly convey your bot's purpose
- Appears below the main title
Welcome Message
- Craft a warm greeting to welcome users and create a friendly atmosphere
- First message users see when opening the chat
Input Box Placeholder
- Define a prompt that guides users on what to type
- Ensures users know how to engage effectively
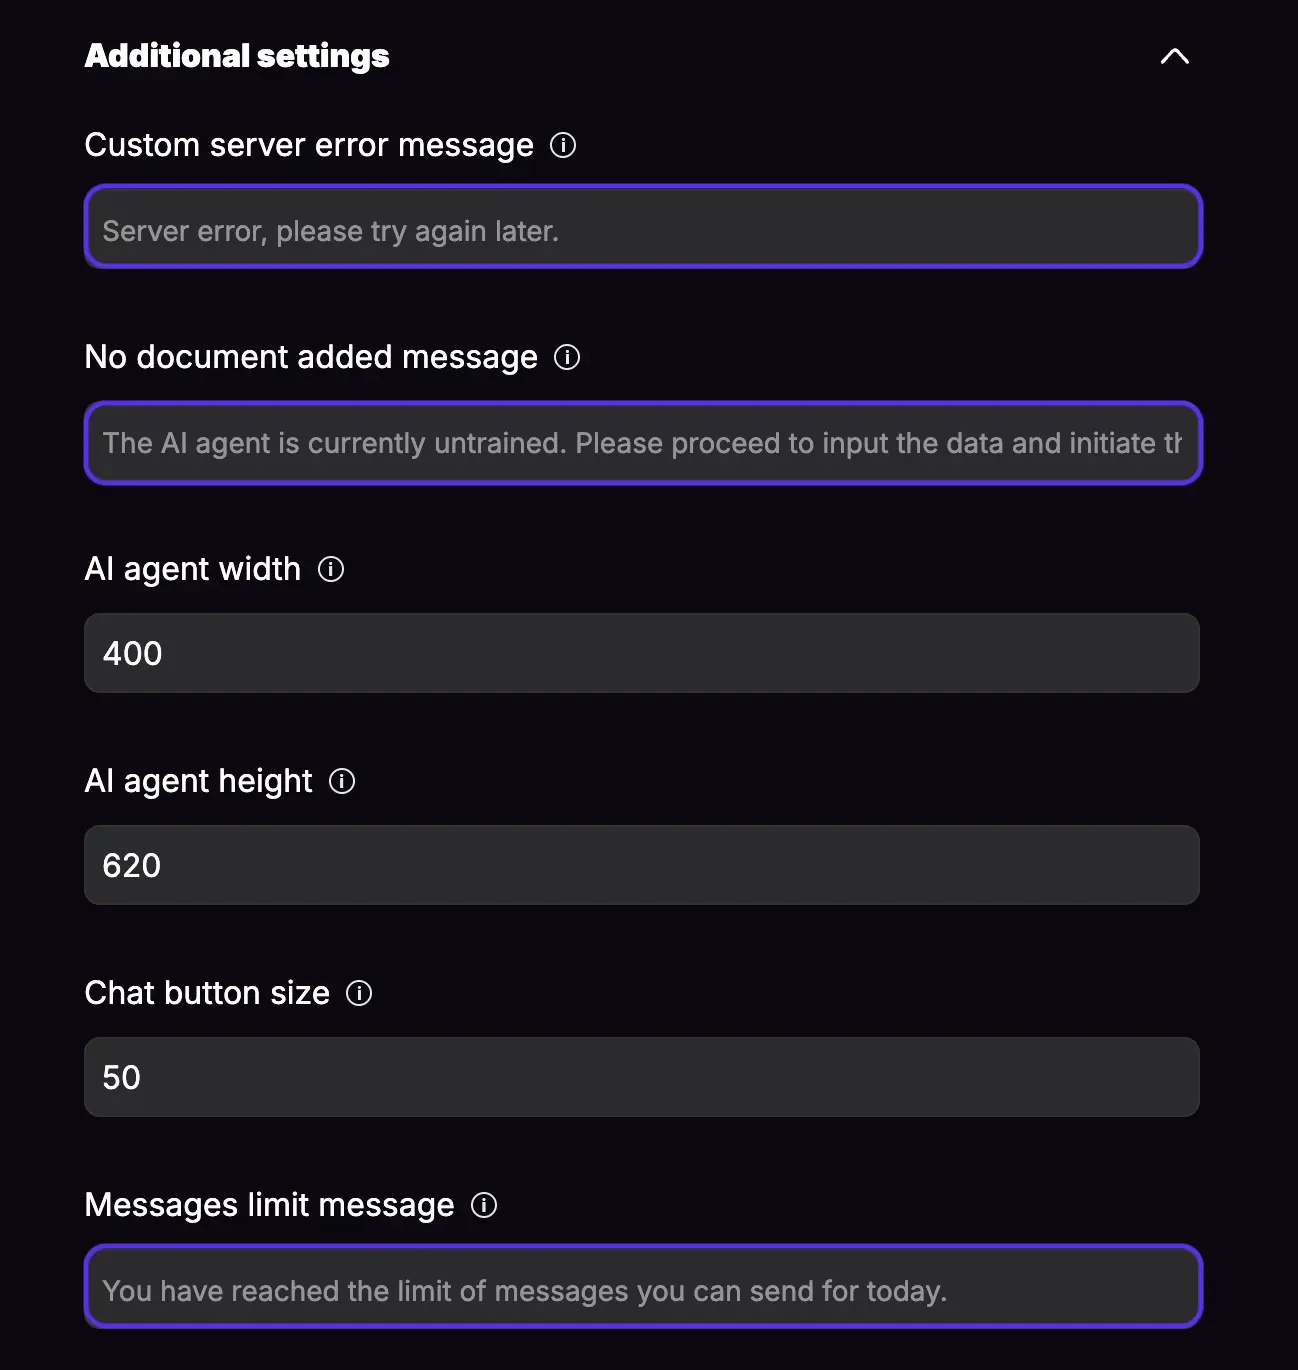
Advanced Message Settings
Configure specialized messages for different scenarios:
- Server Error Message: Custom message displayed when server is unavailable
- No Documents Message: Message shown when no training documents are available
- Messages Limit Message: Notification when user exceeds message limit
Layout and Positioning
Bot Position
Choose where your chat widget appears on the website for optimal user accessibility.
Widget Dimensions
Customize the size of your chat window:
- Width: 300-1000 pixels
- Height: 300-1000 pixels
- Size: 22-256 pixels
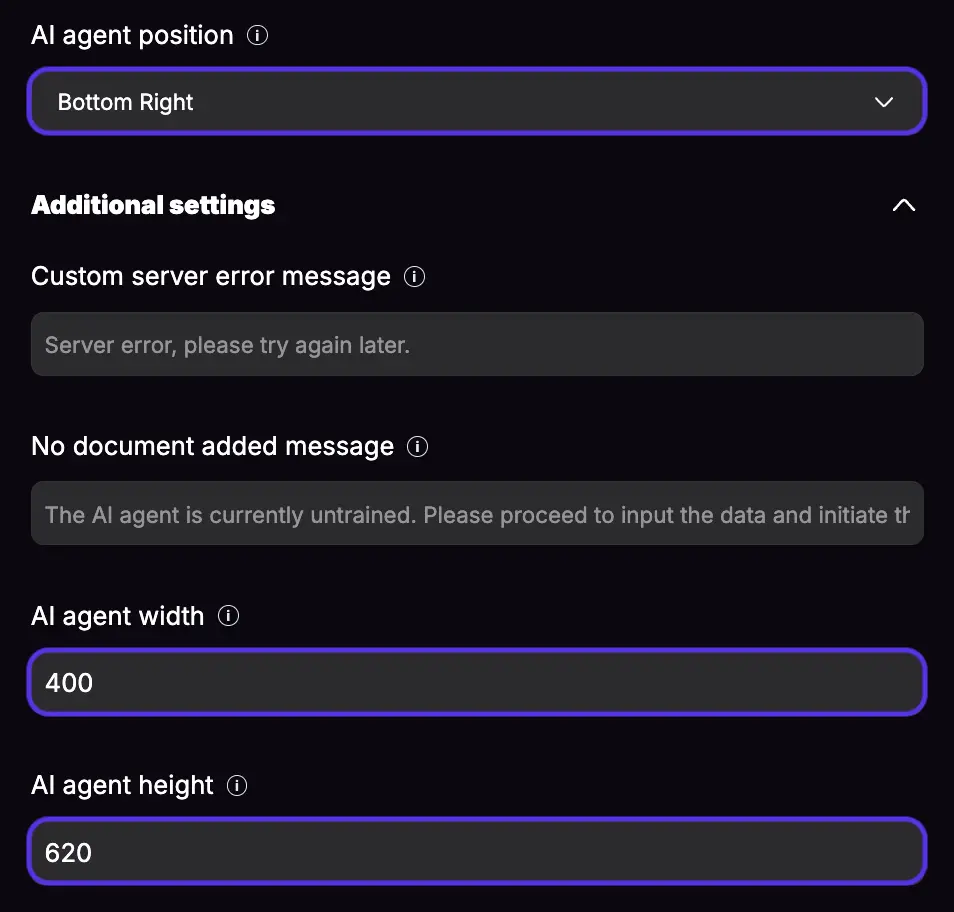
These settings allow you to ensure the chat interface fits perfectly with your website design.
Behavior and Display Settings
Chat Window Behavior
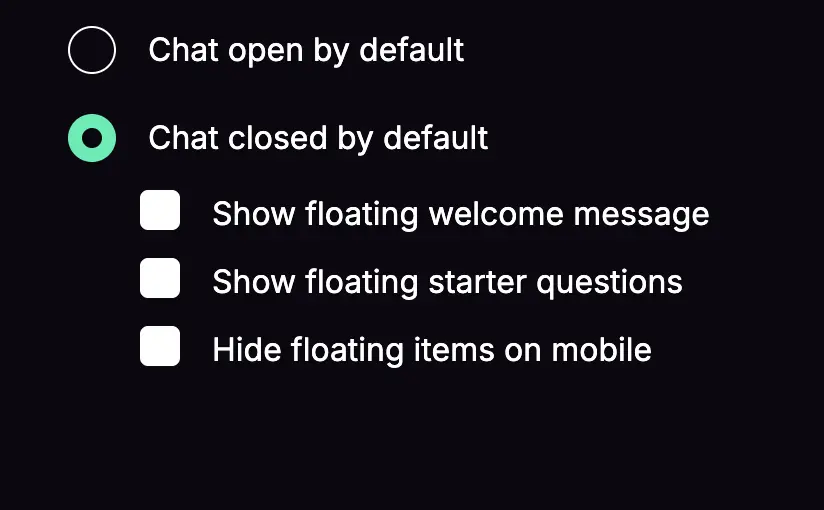
Default State Options:
- Open by Default: Chat window opens automatically when page loads
- Closed by Default: Chat remains minimized until user clicks to open
Floating Elements (Available when chat is closed by default)
- Show Floating Welcome Message: Display a friendly greeting bubble near the chat button
- Show Floating Starter Questions: Provide suggested conversation starters
- Hide Floating Items on Mobile: Option to disable floating elements on mobile devices for better user experience
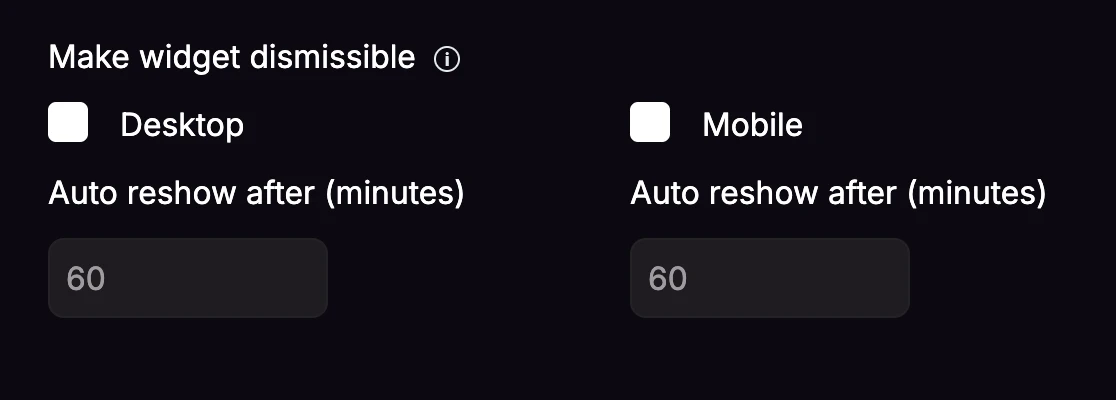
Widget Dismiss and Auto-Reshow
Let users temporarily dismiss the chat widget, and have it reappear automatically after a set time. You can configure this separately for desktop and mobile:
- Enable dismiss — allow the user to dismiss (hide) the widget on that device.
- Auto-reshow minutes — how long to wait before the widget reappears (from 1 minute up to one week).
This is a per-device, manual-dismiss-then-reshow behavior, not a scheduled on/off by time of day.
Branding and Source Display
Show Sources as References Enable this option to display source information with responses, helping users verify information and enhancing credibility.
Chatislav Branding Choose whether to display or hide Chatislav branding (availability depends on your subscription plan - not available for Basic plan).

Terms and Conditions Integration
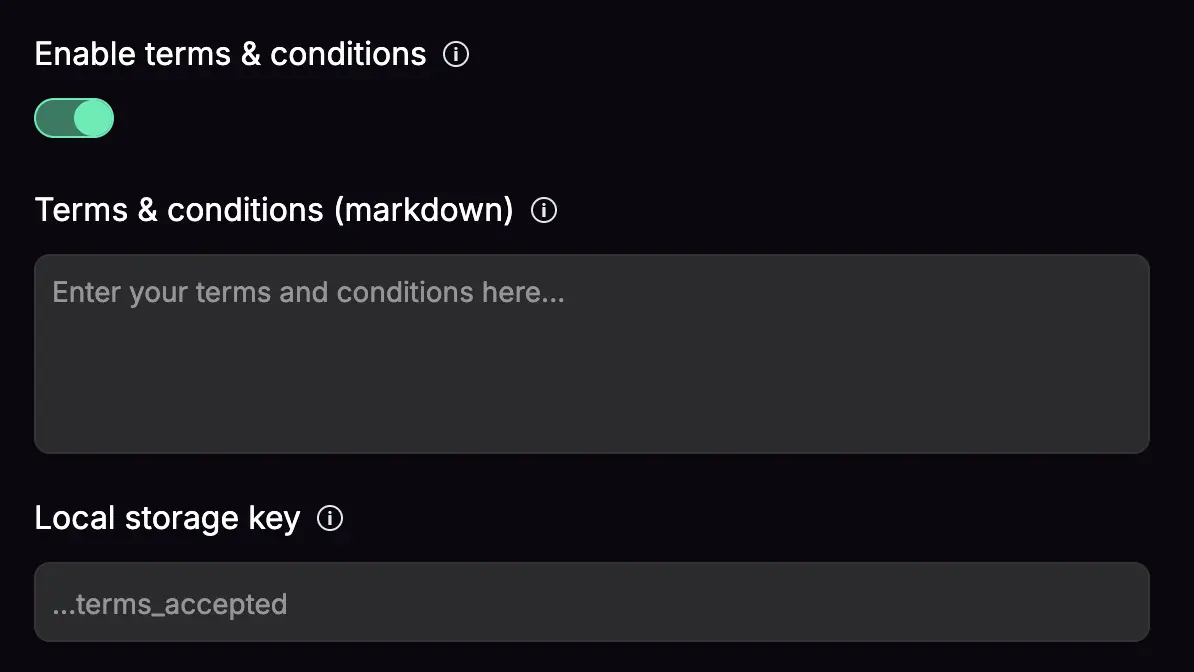
Terms Acceptance Feature
Enable a terms and conditions requirement for users before they can interact with your chat agent:
Configuration Options:
- Enable/Disable: Toggle terms acceptance requirement
- Markdown Content: Define your terms and conditions using markdown formatting
- Local Storage Key: Set a unique identifier for storing user acceptance locally
This feature ensures compliance with legal requirements and user agreements.
Testing and Preview
After configuring your appearance settings, you can preview how your chat agent will look and behave in real-time. The interface updates dynamically as you make changes, allowing you to see the exact user experience.
Best Practices:
- Test your chat agent on both desktop and mobile devices
- Ensure color contrast meets accessibility standards
- Verify that all text is readable against your chosen background colors
- Test floating elements behavior when chat is closed by default
Saving Your Configuration
Once you're satisfied with your customizations:
- Review all settings to ensure they align with your brand
- Click Save to apply changes
- Use Reset if you need to revert to previous settings
Your appearance settings will be immediately applied to your chat agent across all deployment locations.
The comprehensive appearance customization options in Chatislav ensure that your AI agent not only functions effectively but also provides a seamless, branded experience that resonates with your users and enhances your overall customer engagement strategy.