Creating a Catalog
You can build an AI Catalog from a CSV file, Excel file, URL, or Google Sheet.
Step 1: Add a Catalog
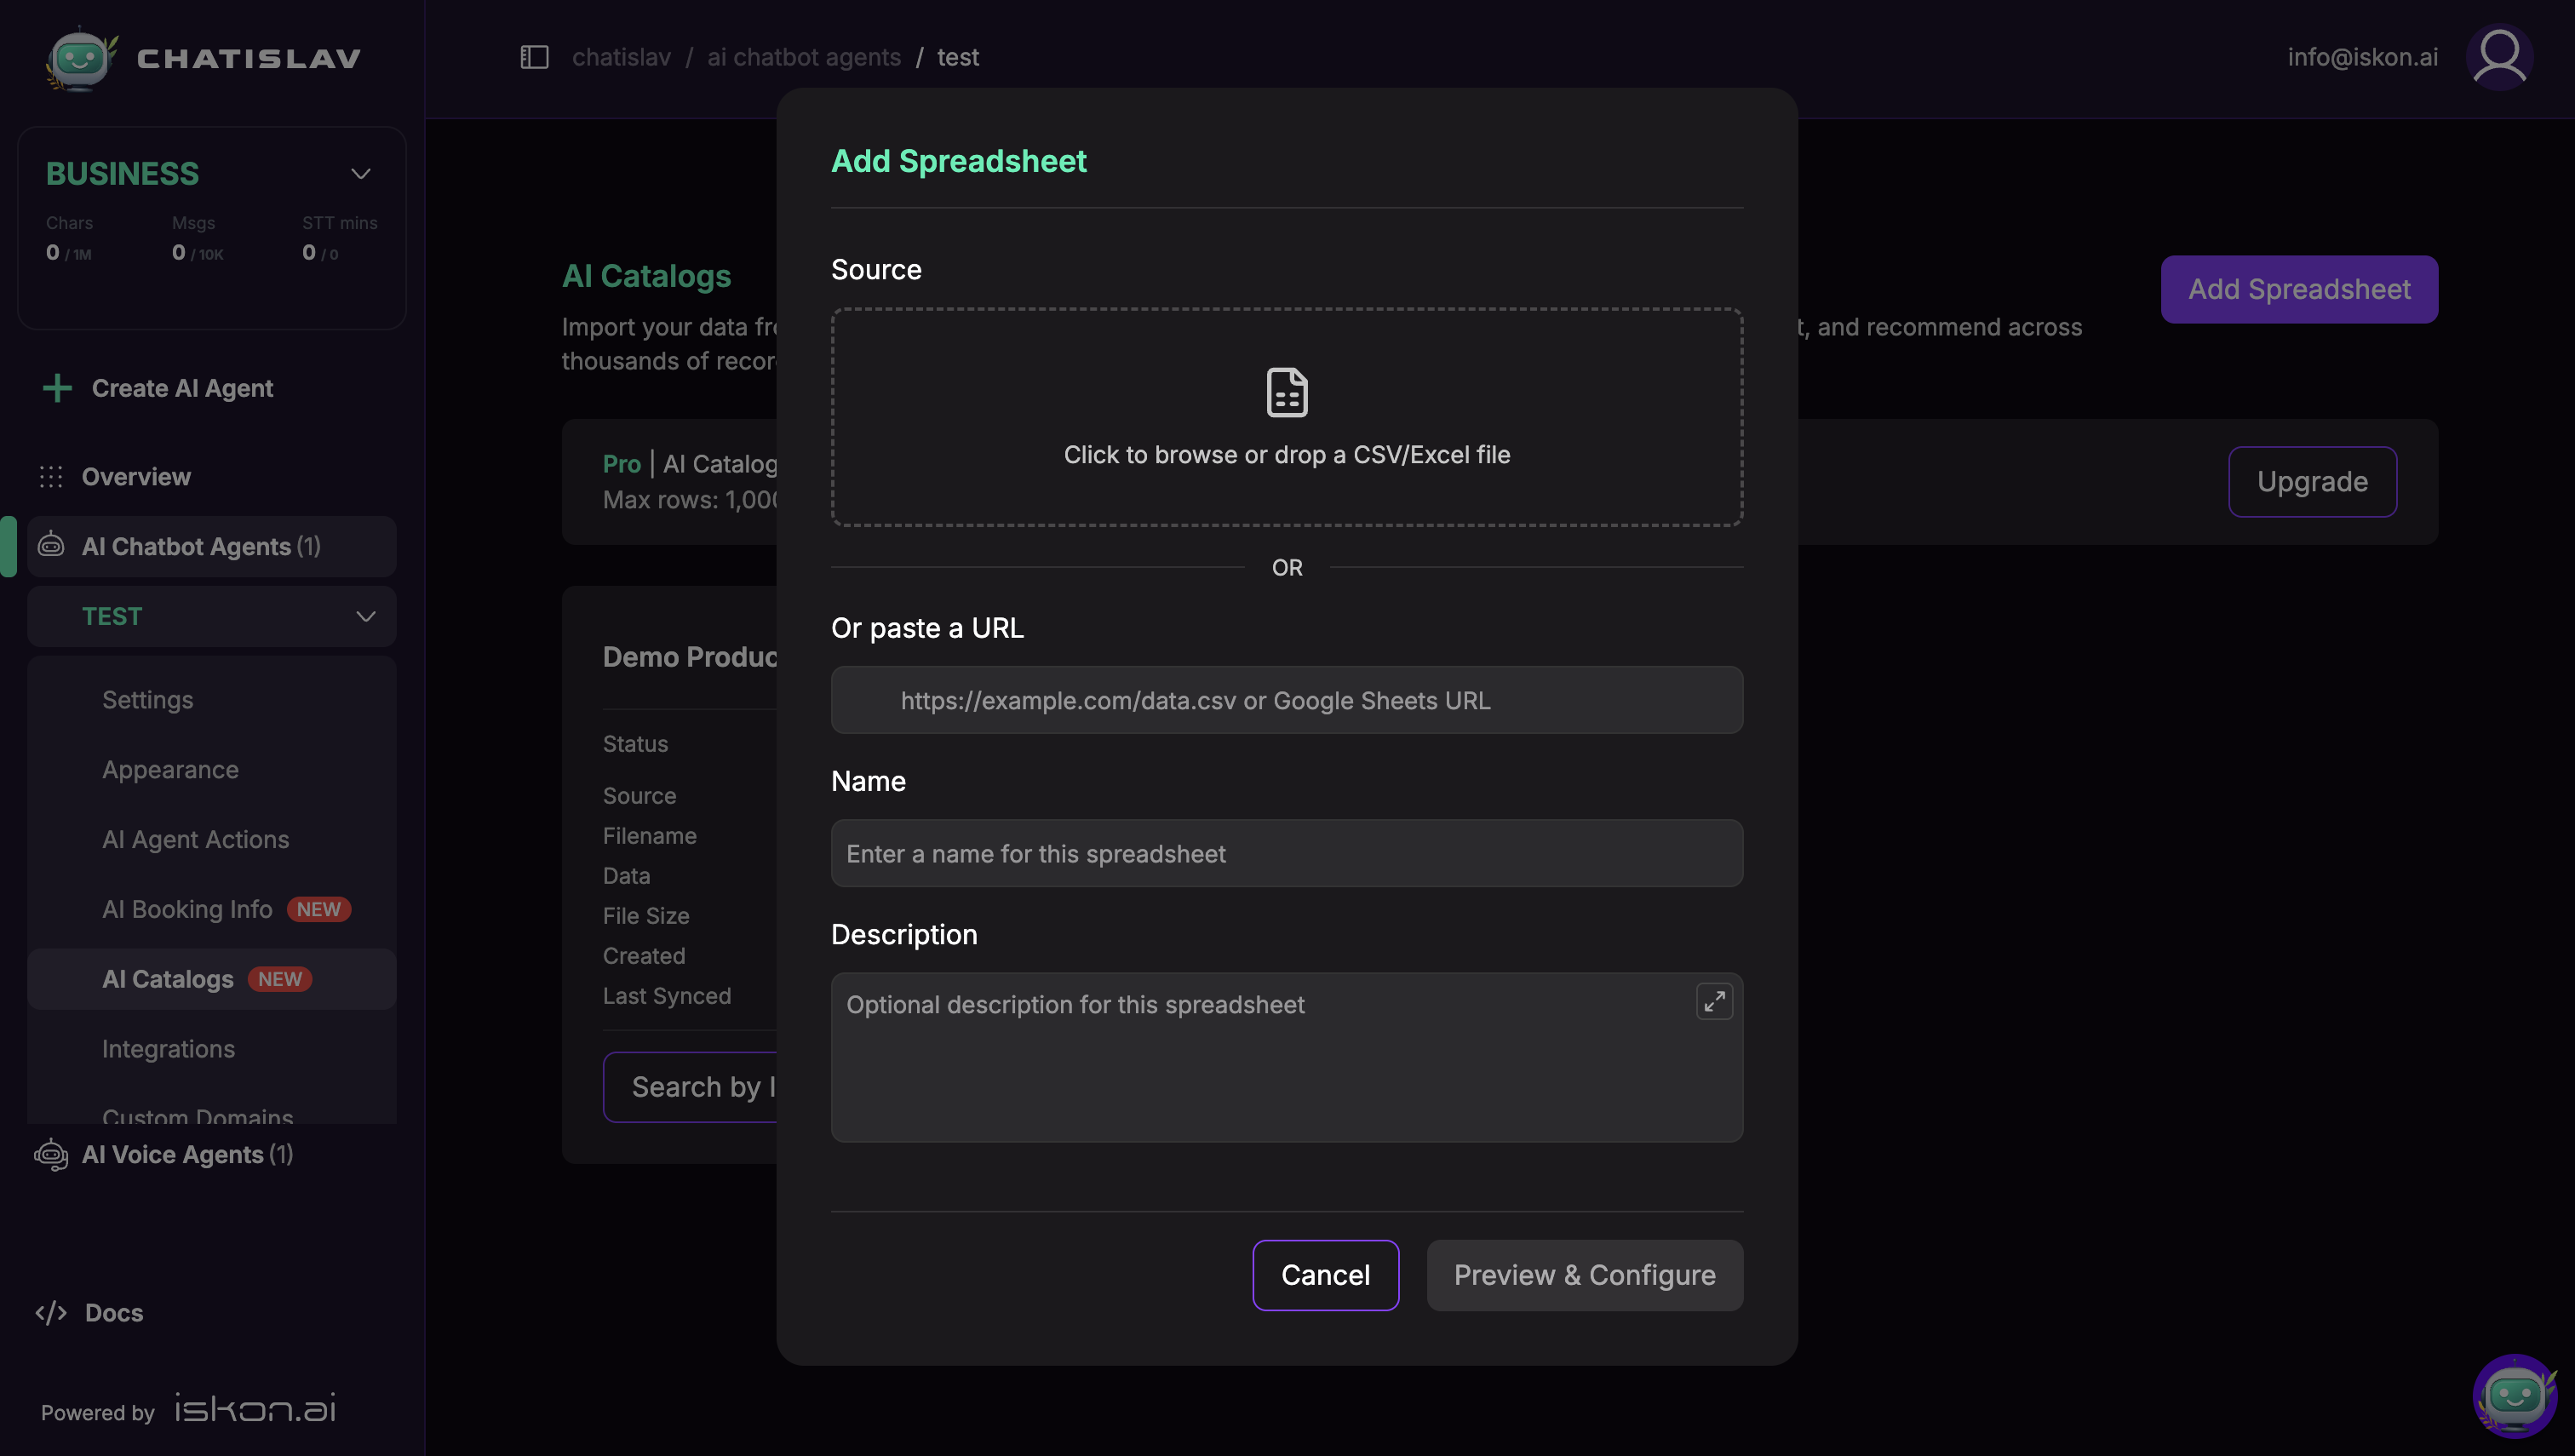
- Open AI Catalogs and click Add Spreadsheet.
- Add a source:
- Drop or browse for a CSV or Excel file (
.csv,.xlsx,.xls). - Paste a direct file URL or a Google Sheets URL.
- Drop or browse for a CSV or Excel file (
- Enter a Name (required) and an optional Description.
- Click Preview & Configure.
For URL sources, Chatislav can show authentication options: None, Basic Auth (username/password), Bearer Token, or API Key with a custom header name.
For Google Sheets, use a sheet that is shared publicly with "Anyone with the link", or connect your Google account when Chatislav asks for access to a private sheet.
Step 2: Configure the Schema
After previewing the source, configure the schema before creating the catalog.
In the preview schema editor, you can:
- Review sample rows before importing.
- Adjust CSV Delimiter and Encoding when needed.
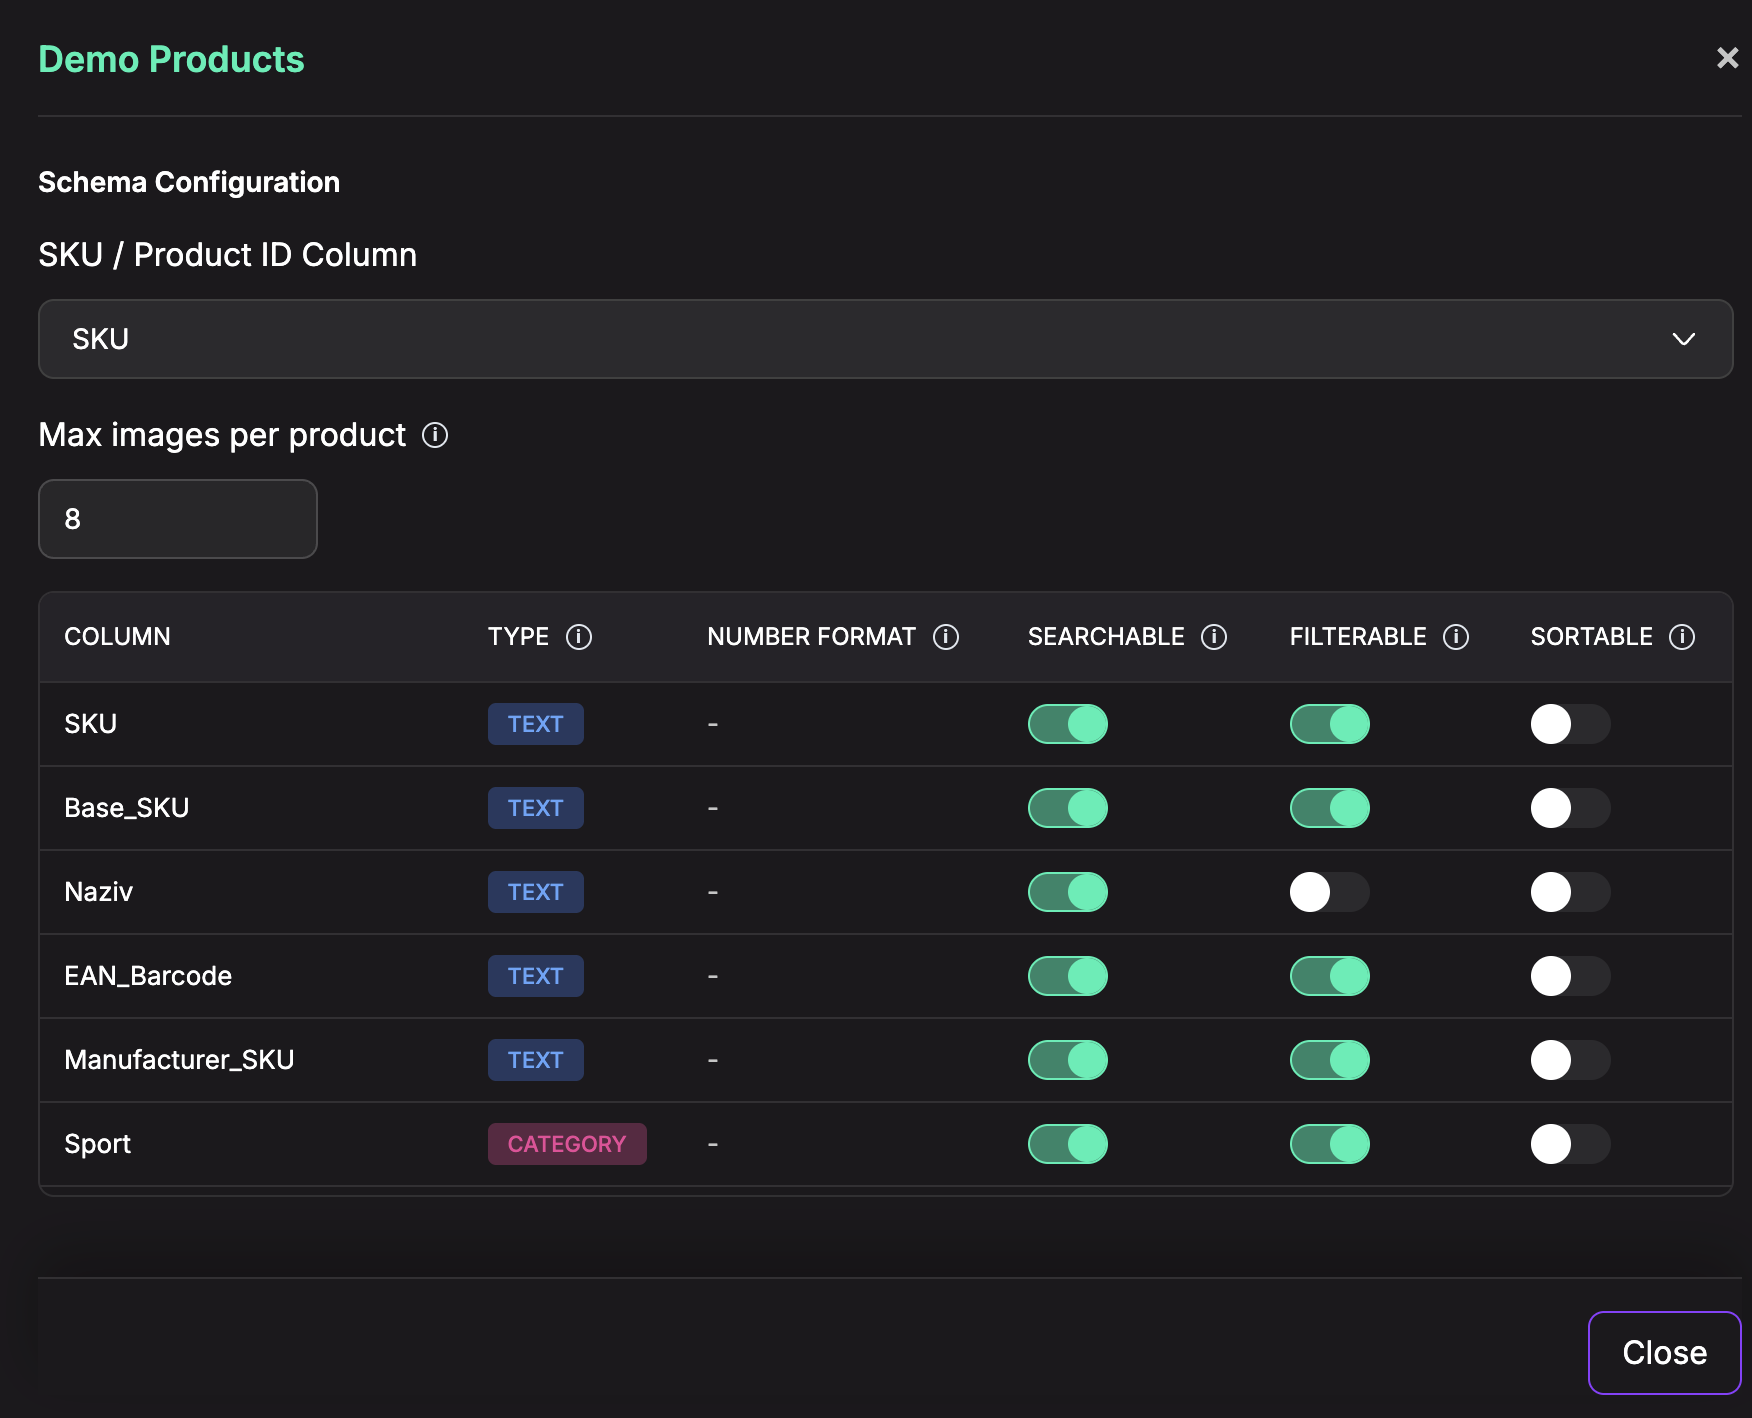
- Choose which columns to include. Your AI Catalog plan controls the maximum number of selected columns.
- Select the SKU / Product ID Column. This should be a stable unique identifier for each row or variant.
For each included column, set:
- Type —
text,number,category,boolean, ordate. Fornumberyou can pick a number format (for example1,000.50or1.000,50). - Searchable — enable text search on this column.
- Filterable — enable filtering (for example price > 100).
- Sortable — enable sorting by this column.
Click Create AI Catalog to import the catalog. Chatislav processes it in the background and shows a status: Pending, Processing, Ready, or Failed.
Step 3: Edit a Ready Catalog
When the catalog is Ready, click Config on the catalog card to adjust schema settings later.
From Config, you can:
- Change the SKU / Product ID Column.
- Set Max images per product (1-12), used for image search and the interactive product-card carousel.
- Change column types, number formats, searchable, filterable, and sortable settings.
Step 4: Keep It in Sync
How you keep a catalog fresh depends on its source:
- File upload — use Reupload from the catalog card. The new file must keep compatible columns and stay within your row and file-size limits.
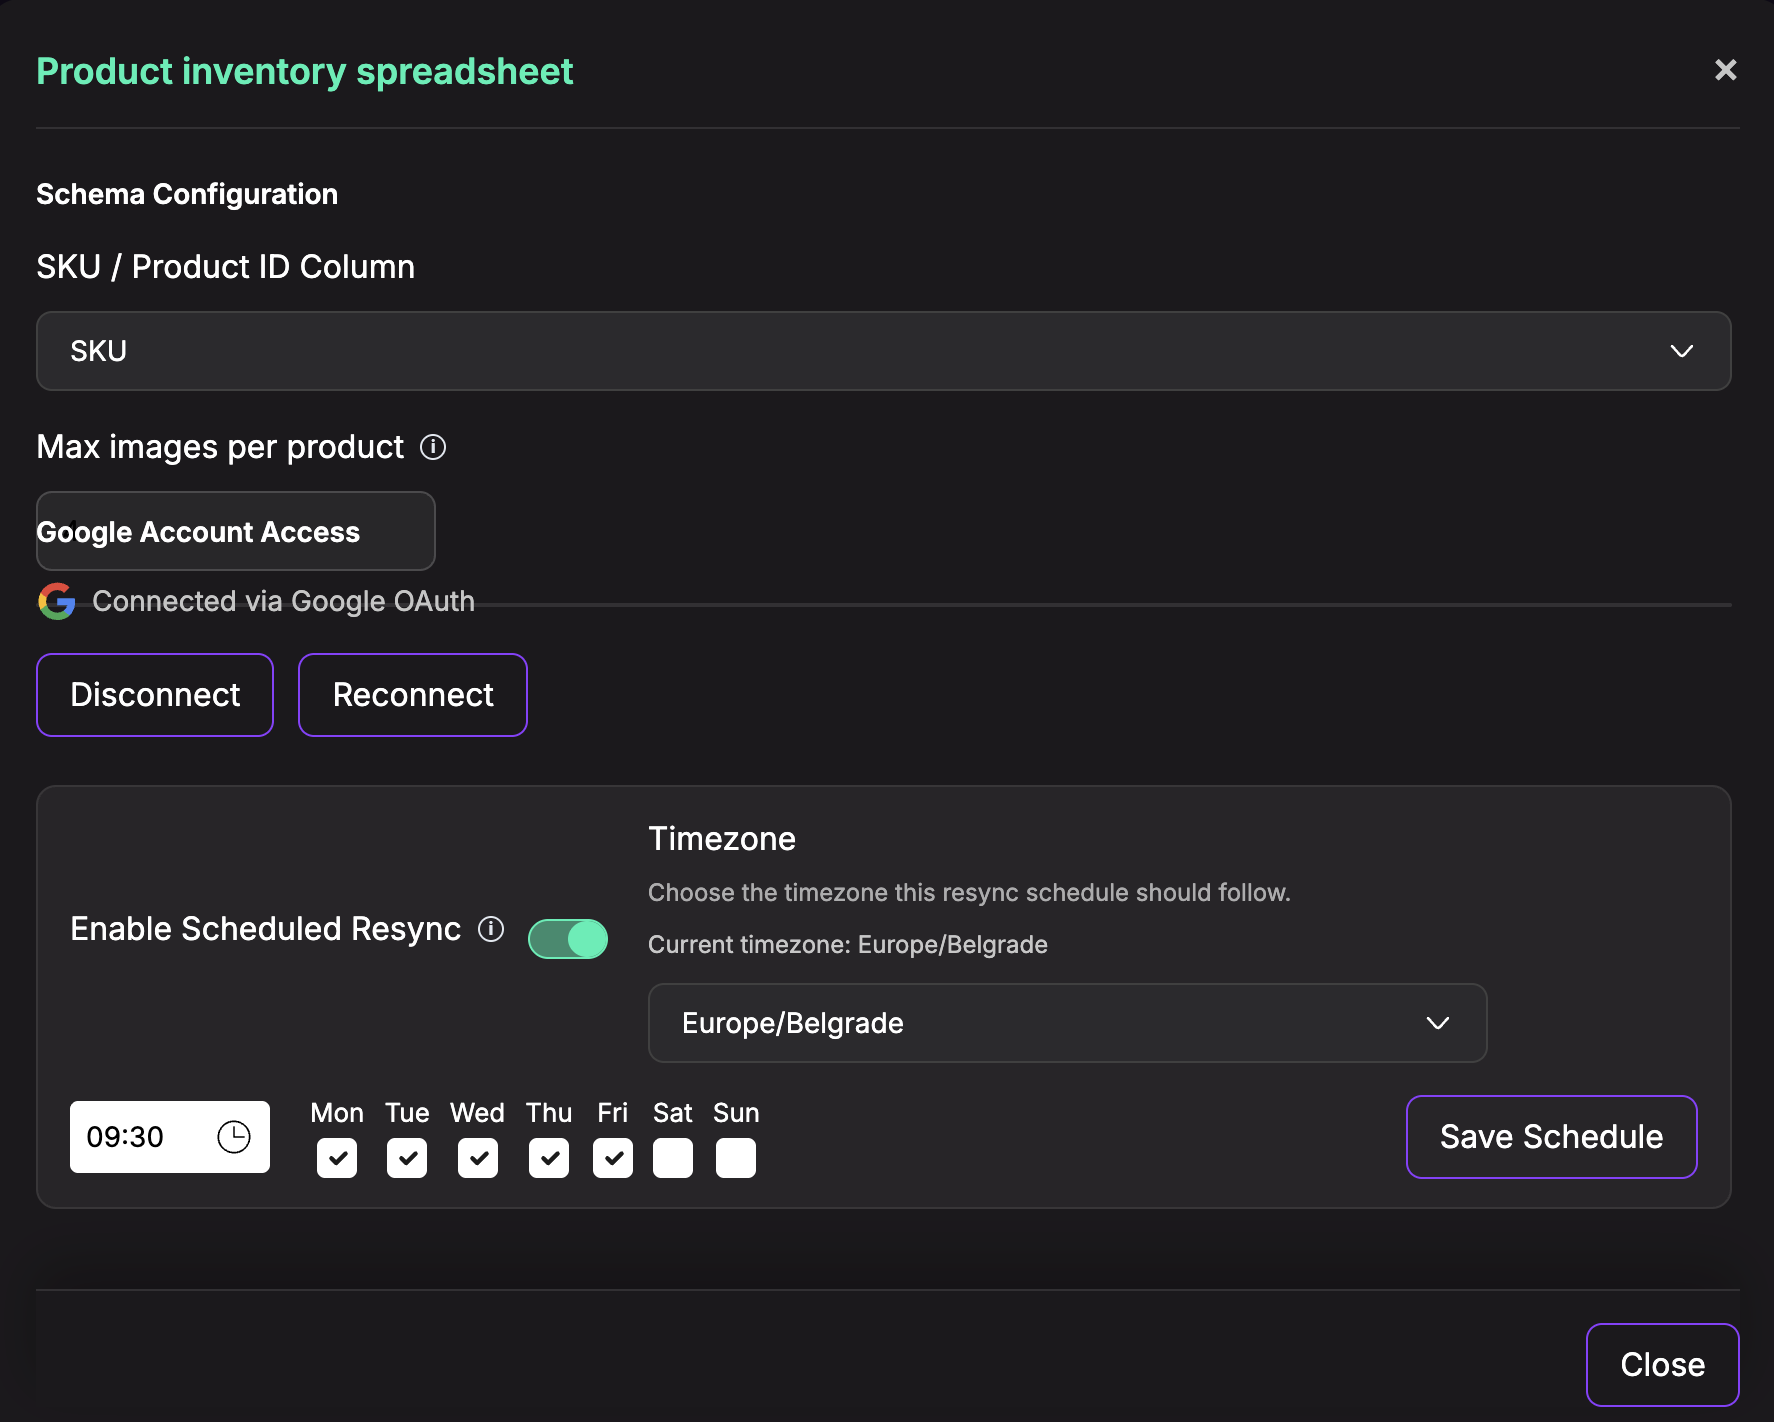
- URL and Google Sheets — use Resync to re-pull the latest data.
- Scheduled Resync — for URL and Google Sheets catalogs, open Config, turn on Enable Scheduled Resync, then choose the timezone, time, and days of the week.
For Google Sheets, Config also shows whether the catalog is using public access or a connected Google account. Use Disconnect or Reconnect if access changes.
Tips
- Mark only the columns you actually search/filter/sort on, to keep results fast and relevant.
- Choose the correct Type per column so filtering and sorting behave as expected (for example numeric prices).
- Choose a stable product ID/SKU column. Data Search and product-card workflows depend on exact product identifiers.
- Set Max images per product if you plan to use image search or product cards.